
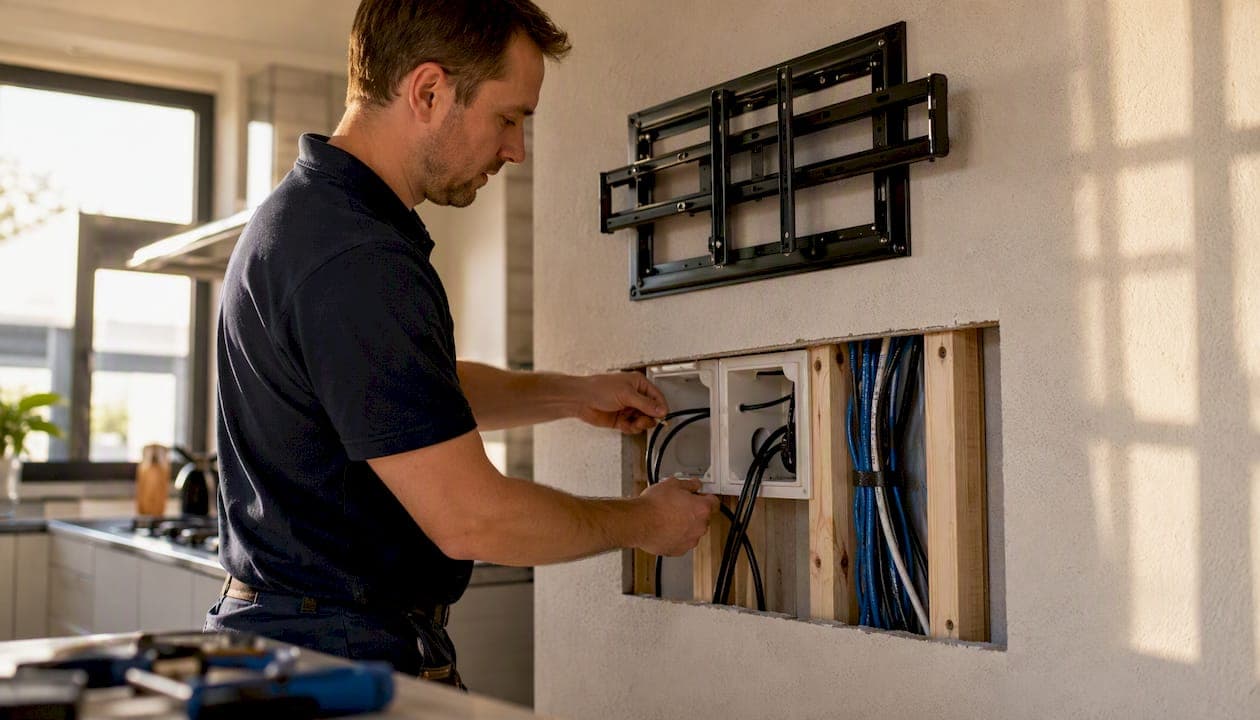
The five concealed cabling options homeowners actually use are surface raceways and paintable cord covers, UL-listed in-wall power kits with low-voltage cable runs, conduit and trunking systems, baseboard and molding routing, and under-carpet or threshold channels. Each one fits a different room, wall type, and budget. The single most important safety rule before you pick any of them: never route a standard appliance cord or extension cord through a wall. NEC Article 400.8 prohibits it, and it creates a genuine fire risk.
Quick scenario guide:
- TV on drywall with wood studs: In-wall power relocation kit plus CL2/CL3 low-voltage cable for HDMI and ethernet
- TV on masonry or concrete: Paintable surface raceway (D-Line or Legrand/Wiremold style) along the wall
- Desk or home office: Raceway along the baseboard or cable tray under the desk surface
- Speakers: Low-voltage in-wall run or baseboard channel for speaker wire
- Lamps and chargers: Cord cover or adhesive cable clips along the baseboard
- Renters: Paintable raceways, removable adhesive clips, or behind-furniture routing only
- Masonry walls: Surface raceway or trunking; in-wall fishing is rarely practical
Key Takeaways
The most reliable concealed cabling installs combine the right method for the wall type, UL-listed components, and documented cable runs labeled at both ends before the wall closes.
| Point | Details |
|---|---|
| Match method to wall type | Use in-wall kits for drywall with studs; use surface raceways for masonry, concrete, or rental properties. |
| NEC Article 400.8 is non-negotiable | Never route a standard extension cord or appliance cord through a wall; use a UL-listed in-wall power kit instead. |
| Label and document every run | Label both ends before the wall closes and keep a simple route diagram to speed any future changes. |
| Conduit future-proofs the install | Properly sized conduit with a pull string lets you add new cables without reopening walls. |
| Djcengineering for complex installs | Djcengineering provides accredited, code-compliant structured cabling and AV installs across South East Queensland with a high first-visit fix rate. |
Table of Contents
- What are the best concealed cabling options for surface raceways?
- How do in-wall power kits work for hiding TV cables?
- Why conduit and trunking are worth the extra effort
- How to safely route cables across floors and doorways
- Using baseboards, molding, and furniture to hide cables
- What tools and materials do you need for a typical install?
- Costs, difficulty, and timeline for each concealment method
- How do you plan and future-proof a concealed cabling install?
- What NEC rules apply, and when do you need an electrician?
- Step-by-step: how to hide TV cables with an in-wall power kit
- Key takeaways and next steps for your project
- When a pro saves you more than just time
- Djcengineering handles the installs that go beyond DIY
- Sources
What are the best concealed cabling options for surface raceways?
Surface raceways are plastic or aluminum channels that mount directly to the wall surface and snap shut over cables. They require no drywall cuts, no stud finding, and no special tools beyond a measuring tape, a utility knife or miter box, and a level. That makes them the go-to for renters, masonry walls, and anyone who wants a same-day result.
Pros and cons at a glance:
- Renter-friendly: no permanent wall damage, removable with a heat gun or adhesive remover
- Paintable: brands like D-Line and Legrand/Wiremold sell white and off-white channels that accept standard latex paint
- Limited capacity: a single 1-inch channel holds roughly two to four cables before it gets tight
- Visible: even painted, a raceway is a slight surface bump; it works best along baseboards or behind furniture where sight lines are low
For power cables, most paintable raceways are rated for line-voltage use when installed per the manufacturer's instructions. Keep power and data in separate channels whenever possible, which both reduces interference and makes future changes easier.
Tidy install sequence:
- Measure the full run from source to destination
- Choose a channel width at least twice the diameter of your cable bundle (sizing guidance from Family Handyman recommends roughly 2× the bundle)
- Cut channels to length with a miter box for clean 45° corners
- Mount with the supplied adhesive tape or screws, keeping the channel level
- Route cables and snap the cover closed
- Paint after a 24-hour adhesive cure if color-matching to the wall
A basic D-Line or Legrand/Wiremold raceway kit for a single TV run typically costs $15–$40 in materials and takes under two hours.
How do in-wall power kits work for hiding TV cables?
For a wall-mounted TV on standard drywall, an in-wall power relocation kit is the cleanest code-compliant result you can get without hiring an electrician. The kit creates two recessed boxes: one behind the TV that accepts the TV's power plug, and one lower on the wall near an existing outlet. A UL-listed internal harness carries power between them inside the wall cavity. Low-voltage cables (HDMI, ethernet, optical) run through a separate low-voltage opening in the same stud bay.
Low-voltage cables can be fished through wall cavities freely, but the TV's standard power cord cannot go through the wall under NEC Article 400.8. The in-wall kit solves that by replacing the cord run with a code-compliant internal harness.
The SANUS BSA-IWP801 is a well-known consumer example: it includes a prewired recessed outlet, a low-voltage passthrough, mounting hardware, and a hole-saw template. The Legrand/Wiremold equivalent (available at Home Depot) adds a cable grommet and mounting brackets. Both are designed for DIY installs that plug into an existing receptacle rather than requiring panel wiring.
Basic install sequence:
- Locate the nearest outlet below the TV mounting position
- Use a stud finder with AC detection to confirm no wiring runs through your planned cut zone
- Mark and cut two openings: one at TV height, one near the outlet
- Fish the low-voltage cable between the openings using fish tape or glow rods
- Install the recessed boxes per the kit instructions
- Plug the upper box into the lower harness, mount the TV, and route HDMI/ethernet through the low-voltage opening
Typical cost: $50–$120 for the kit, plus one to three hours of work.
When to stop and call an electrician:
- No existing outlet within reach of the lower box
- The install requires adding a new circuit or moving a breaker
- You encounter balloon framing, a fire block you cannot get past, or gas lines
- You are not comfortable working near live line voltage at any point
Pro Tip: Before cutting, use a stud finder that detects both studs and live AC wiring. A cheap one that only finds studs is not enough for this job.
Why conduit and trunking are worth the extra effort
Conduit and trunking are the options that age best. Where a raceway holds what you put in it today, a properly sized conduit lets you pull new cables years from now without opening a single wall. That matters more than most homeowners expect, especially as HDMI versions, network speeds, and smart-home devices keep changing.
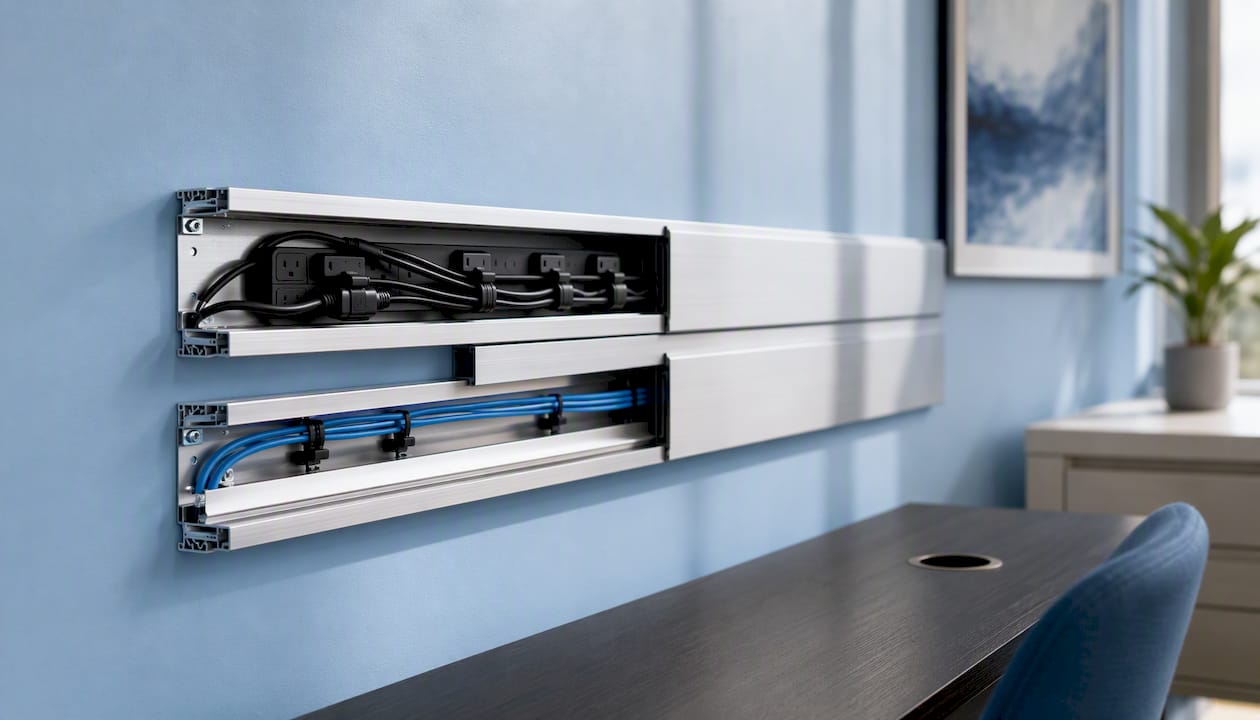
Decorative trunking systems like the Wiremold Access 5000 series go further: they provide dual-channel separation that keeps line-voltage power physically isolated from low-voltage data, which reduces electromagnetic interference on sensitive audio and network runs. Architecturally integrated trunking from manufacturers like OBO Bettermann can conceal power supplies, LED strips, and modular device mounts behind anodized aluminum covers, making the trunking itself a design element rather than an afterthought.
For home server rooms, comms cabinets, or whole-home AV installs, conduit paired with a small home cabling cabinet gives you a clean, serviceable termination point for every run.
Key planning rules for conduit:
- Keep bend radius generous: a sharp 90° elbow on a Cat6 or HDMI cable degrades signal and makes future pulls nearly impossible
- Use vertical cable managers at rack transitions to preserve bend radius and protect cables during routing
- Separate power and data conduits by at least 2 inches, or cross them at right angles when they must share a path
- Never fill a conduit more than 40% of its cross-section; leave room for future pulls
Pro Tip: Always pull a draw string through every conduit run before you close the wall. It costs nothing and saves hours the first time you need to add a cable.
How to safely route cables across floors and doorways
Floor channels and threshold raceways solve a specific problem: getting a cable from one side of a room to the other without creating a trip hazard or running it under permanent flooring where heat can build up. Flat threshold channels sit flush at doorways and are typically less than 3/8 inch tall, low enough that most people step over them without noticing. Rubber floor raceways are thicker and better suited to temporary setups like a party, a pop-up desk, or a projector run.
Safe use guidelines:
- Size the channel so the cable bundle fills no more than half the interior space
- Never run power cables under permanent carpet or padding where heat cannot escape; check the cable's temperature rating and the manufacturer's guidance before covering it
- Secure threshold channels with the supplied screws at doorways; adhesive-only installs tend to shift underfoot
- For a permanent media cabinet-to-TV run across a hardwood floor, a flat aluminum threshold channel painted or stained to match is far less visible than most people expect
Under-carpet cable protectors work well for low-voltage runs (speaker wire, ethernet) in rooms where the carpet will not be replaced soon. They are not a safe long-term solution for power cables.
Using baseboards, molding, and furniture to hide cables
Baseboard channels and hollow molding are the middle ground between a surface raceway and a full in-wall run. They sit at floor level where cables naturally want to travel, and a painted channel at baseboard height is nearly invisible from standing eye level.
Options worth knowing:
- Cable-hiding baseboards: replacement or add-on baseboard profiles with a hollow channel that accepts cables; available at most home improvement stores
- Hollow crown or base molding: standard wood or MDF molding routed hollow; a finish carpenter can create this as part of a renovation
- Furniture routing: running cables behind a bookcase, entertainment unit, or desk keeps them completely out of sight with zero wall work; use adhesive cable clips or Velcro ties to keep them organized against the back of the furniture
For renters, removable adhesive cable clips (Command brand or equivalent) along the back of a baseboard or behind furniture are the safest choice. They leave no marks on painted walls when removed correctly.
Quick how-to for baseboard channels:
- Measure the full run and buy 10% extra length for corners and waste
- Use grommets or brush plates at any wall penetration point to protect the cable jacket
- Secure cables inside the channel with Velcro ties rather than zip ties; Velcro lets you add or remove cables without cutting
- Paint the channel before snapping the cover on for the cleanest color match
What tools and materials do you need for a typical install?
Getting the right tools together before you start saves a second trip to the hardware store and prevents the most common DIY mistake: cutting a hole and then discovering you're missing the fish tape.
Tools:
- Stud finder with AC detection (not just stud-only)
- Fish tape or glow rods (at least 15 feet for a standard TV run)
- Jab saw or drywall saw for recessed box openings
- Multimeter for verifying circuits before working near them
- Wire strippers, screwdrivers (flathead and Phillips), and a level
- Utility knife and miter box for cutting raceways cleanly
Materials:
- UL-listed in-wall rated cable: CL2 or CL3 for low-voltage (HDMI, speaker, ethernet); use Cable Matters flat in-wall HDMI or a similar in-wall rated product for HDMI runs
- In-wall power relocation kit (SANUS, Legrand/Wiremold) if running power behind a TV
- Paintable raceway (D-Line, Legrand/Wiremold) for surface runs
- Grommets and brush plates at wall entry/exit points
- Velcro cable ties and cable labels (both ends of every run)
Safety items:
- Safety glasses and a dust mask for drywall cutting
- Gloves when handling cut drywall edges
- Drop cloth to catch drywall dust
- Vacuum for cleanup
Before you cut anything:
- De-energize the circuit at the breaker and verify with a multimeter
- Scan the full cut zone with a stud finder that detects live AC
- Check for plumbing runs on exterior walls and near bathrooms
Costs, difficulty, and timeline for each concealment method
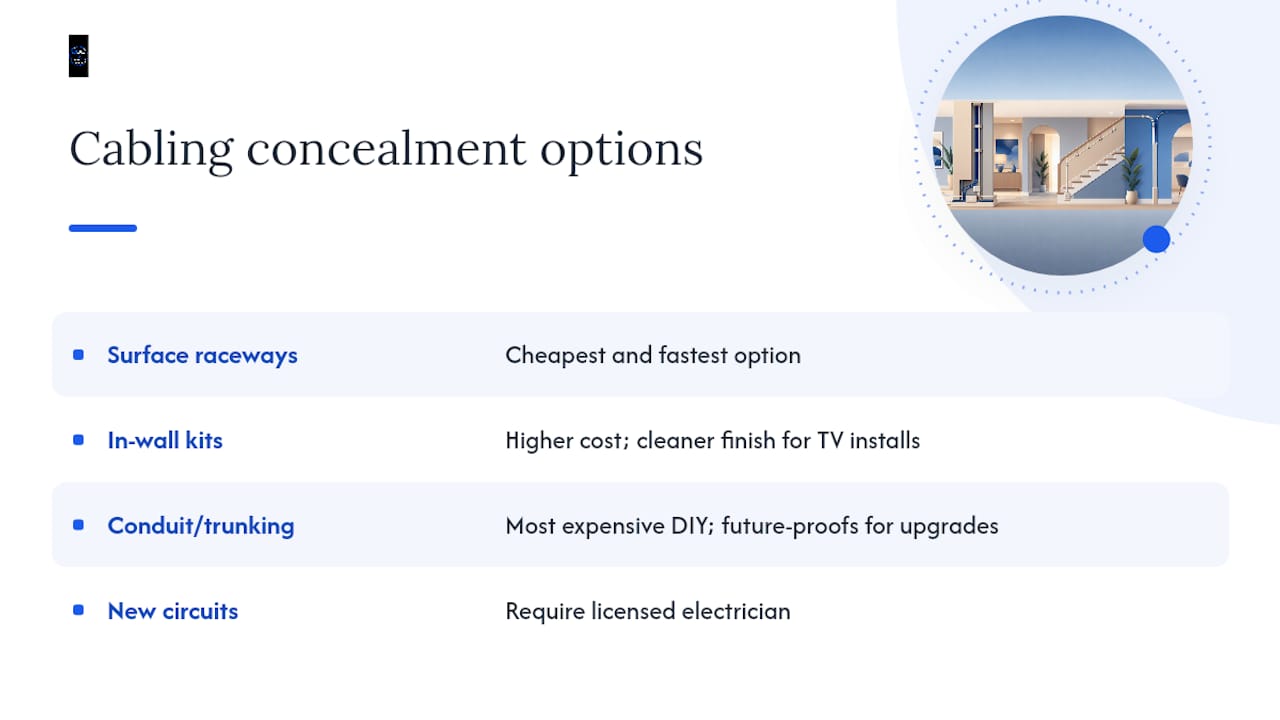
Surface raceways are the cheapest and fastest option. In-wall kits cost more but deliver a cleaner result for TV installs. Conduit and trunking are the most expensive DIY path but the only one that genuinely future-proofs a home for multiple cable upgrades. Any job that requires a new circuit or panel work belongs with a licensed electrician regardless of which method you choose.
How do you plan and future-proof a concealed cabling install?
The installs that cause the most headaches later are the ones where nobody labeled anything or documented where the cables actually run. A cable labeled at both ends takes 30 seconds. Finding an unlabeled cable in a wall three years later can take hours.
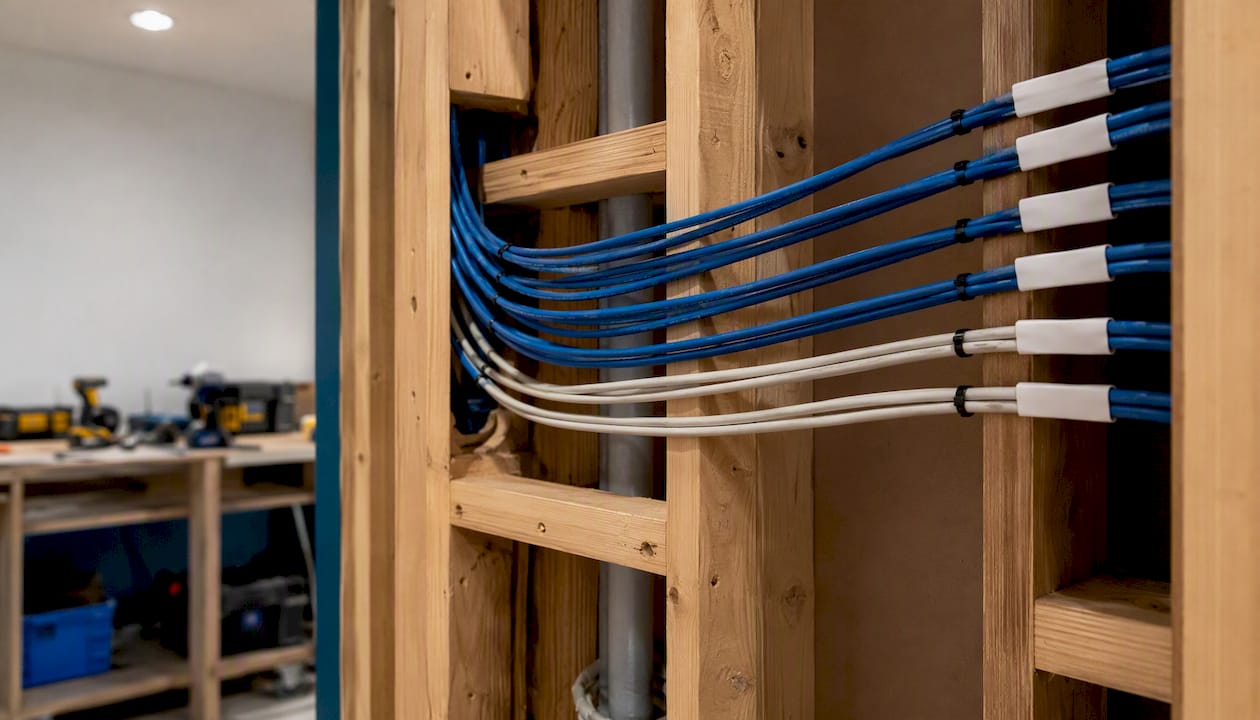
Label both ends of every run, separate power from data, use correct cable lengths, and document routes to avoid spaghetti cabling and speed future troubleshooting. That guidance applies equally to a two-cable TV install and a whole-home structured cabling project.
Labeling checklist:
- Label both ends of every cable before the wall closes
- Use a consistent naming convention: room + purpose + number (e.g., "LR-TV-HDMI-1")
- Record the route on a simple hand-drawn floor plan or a photo taken before the drywall goes back
- Store the documentation somewhere the next owner or technician can find it
Separation rules:
- Keep power cables at least 2 inches from data cables in parallel runs
- When power and data must cross, do it at a right angle to minimize interference
- Use dual-channel trunking (Wiremold Access 5000 style) where both power and data share the same wall path
Bend radius:
- Cat6 ethernet: minimum bend radius is 4× the cable diameter; tight bends cause crosstalk and speed drops
- HDMI: avoid bends sharper than a 2-inch radius; kinking an HDMI cable can cause intermittent signal loss that is very hard to diagnose
- Vertical cable managers and D-rings preserve bend radius at rack transitions and protect cables during routing
Pro Tip: Run one extra empty conduit alongside every structured cabling install. It costs almost nothing at installation time and gives you a clean path for the next technology you haven't bought yet.
For a detailed technical checklist aligned with professional installation standards, the data cabling installation checklist from Djcengineering covers bend radius, labeling, and testing in depth.
What NEC rules apply, and when do you need an electrician?
The rule homeowners most commonly break is also the most dangerous one: burying a standard extension cord or appliance power cord inside a wall. NEC Article 400.8 prohibits routing flexible cords through walls, ceilings, or floors. The insulation on a standard power cord is not rated for enclosed spaces, and heat buildup inside a wall cavity is a fire risk.
DIY-safe tasks (no license required in most jurisdictions):
- Installing a UL-listed plug-in in-wall power kit that taps an existing outlet
- Fishing low-voltage cables (HDMI, ethernet, speaker wire, coax) through stud bays
- Mounting surface raceways and routing cables through them
- Installing baseboard channels and floor threshold raceways
Licensed electrician required:
- Adding a new outlet or circuit at any point in the run
- Moving or extending existing house wiring
- Any work in a panel or subpanel
- Commercial properties, condos with shared walls, or jurisdictions that require permits for any electrical work
Hire-a-pro checklist:
- No existing outlet within reach of the TV's lower recessed box
- The project requires a dedicated circuit (home theater amplifiers, projectors)
- Complex framing: balloon framing, fire blocks you cannot pass, or steel studs
- Gas lines, chimneys, or HVAC ducts in the planned cable path
- You are not comfortable working near live line voltage at any stage
Always use UL-listed components, follow manufacturer instructions exactly, and pull a permit when your jurisdiction requires one. Unpermitted electrical work can create problems when you sell the home.
Step-by-step: how to hide TV cables with an in-wall power kit
This walkthrough covers a standard TV on drywall with wood studs and an existing outlet below. Three code-compliant methods exist for hiding HDMI and power for a wall-mounted TV: an in-wall power bridge kit, a surface raceway, or routing through an existing chase or built-in furniture. This sequence covers the in-wall kit method.
Tools and materials:
- Stud finder with AC detection
- In-wall power kit (SANUS BSA-IWP801 or Legrand/Wiremold equivalent)
- CL2 or CL3 rated low-voltage cable for HDMI/ethernet
- Fish tape or glow rods
- Drywall saw or jab saw
- Grommets or brush plates
- Cable labels, Velcro ties, level, pencil
Step-by-step:
- Plan and measure. Mark the TV mounting height. Locate the nearest outlet directly below. Confirm both points are in the same stud bay.
- Scan the wall. Run the stud finder across the full area between the two planned openings. Mark any studs, live wiring, or obstructions.
- Mark box locations. Use the hole-saw template included with the kit to mark both openings: one at TV height, one near the outlet.
- Cut the openings. Use the drywall saw to cut both holes. Work slowly; stop immediately if you hit anything unexpected.
- Fish the low-voltage cable. Feed fish tape from the upper opening downward. Attach the CL2/CL3 cable and pull it through. Label both ends before the cable disappears into the wall.
- Install the recessed boxes. Snap or screw the upper and lower boxes into the drywall per the kit instructions. The lower box plugs into the existing outlet; the upper box provides a recessed outlet behind the TV.
- Mount the TV and route cables. Connect HDMI and ethernet through the low-voltage opening. Plug the TV into the upper recessed outlet.
- Test before finishing. Power on the TV and verify all signal cables before securing any slack or installing cover plates.
- Secure and finish. Velcro-tie any slack inside the wall cavity, install cover plates, and label both ends of every cable run.
Troubleshooting:
- Fish tape won't pass: there is likely a fire block. Drill a small access hole at the block, notch through it, and patch afterward, or switch to a surface raceway for that section.
- Plate sits crooked: the drywall opening is slightly oversized; use the mounting wings on the recessed box to pull it flush before tightening.
- No outlet directly below the TV: stop here and call an electrician, or switch to a surface raceway run down to the nearest outlet.
Key takeaways and next steps for your project
Pick one method and start small. A surface raceway or in-wall kit handles the most common scenario (a wall-mounted TV) in a single afternoon. Conduit and trunking are worth the extra planning for whole-home installs or any project where you expect to add cables later.
One-line action by scenario:
- TV on drywall: buy a SANUS or Legrand/Wiremold in-wall kit, fish CL2/CL3 cable, and follow the step-by-step above
- TV on masonry: mount a paintable D-Line or Legrand/Wiremold raceway from the TV down to the nearest outlet
- Renters: use paintable raceways or removable adhesive clips; document what you installed so you can remove it cleanly
- Speakers: fish CL2 speaker wire through the wall or run it in a baseboard channel at floor level
- Desk or home office: a baseboard raceway or under-desk cable tray keeps power and data organized without wall work
Whatever method you choose, label both ends of every cable before the wall closes, keep a simple diagram of where runs travel, and follow NEC rules throughout. That documentation is worth more than any cable management product when something needs to change in three years.
For home ethernet planning, the home ethernet wiring guide from Jupiter AV covers low-voltage run planning in practical detail.
When a pro saves you more than just time
The most common DIY mistake isn't a wrong tool or a missed step. It's the plan that looked fine on paper until the wall opened up. A fire block where there shouldn't be one. An outlet that turns out to be on a shared neutral. A cable path that runs straight through a gas line chase. These aren't rare edge cases; they show up regularly in older homes, and they're the exact moments where a homeowner's afternoon project becomes a multi-day repair.
The second most common mistake is burying an extension cord in the wall because the in-wall kit seemed like overkill. It isn't. The NEC prohibition on flexible cords in walls exists because the insulation isn't rated for enclosed heat buildup, and that risk doesn't go away because the cord is out of sight. A professional installer catches this before the drywall closes, not after.
What a professional installation actually provides:
- Code-compliant wiring with the correct cable ratings for each application
- Proper conduit or trunking with documented routes and labeled terminations
- Bend radius maintained throughout, so cables perform at spec years later
- A handover package: as-built diagrams, cable labels, and test results
- Warranty on workmanship, not just the products
The practical case for hiring a pro isn't complexity for its own sake. It's that a well-documented, code-compliant install adds value to the home, passes inspection, and doesn't need to be redone when you sell.
Djcengineering handles the installs that go beyond DIY
When the TV job turns into a whole-home AV project, or the desk cable run reveals you need structured cabling throughout the office, that's where Djcengineering's professional structured cabling and AV installation service becomes the practical next step.

Every install includes a survey, code-compliant wiring, professional labeling and documentation, and a tested handover. You get a system that works on day one and is serviceable for years. Request a quote or site survey at Djcengineering and get a fixed-scope proposal for your project.
Sources
- Wiremold Access 5000 series (Elliott Electric)
Recommended
- Professional Audio Visual Installation: The Engineering Approach to Integrated Systems | DJC Engineering
- Data Cabling Gold Coast: The 2026 High-Performance Installation Checklist | DJC Engineering
- Commercial CCTV Security: A Professional Guide to High-Performance Surveillance | DJC Engineering
- Commercial Network Cabling Brisbane: The Engineered Backbone of Modern Business in 2026 | DJC Engineering