
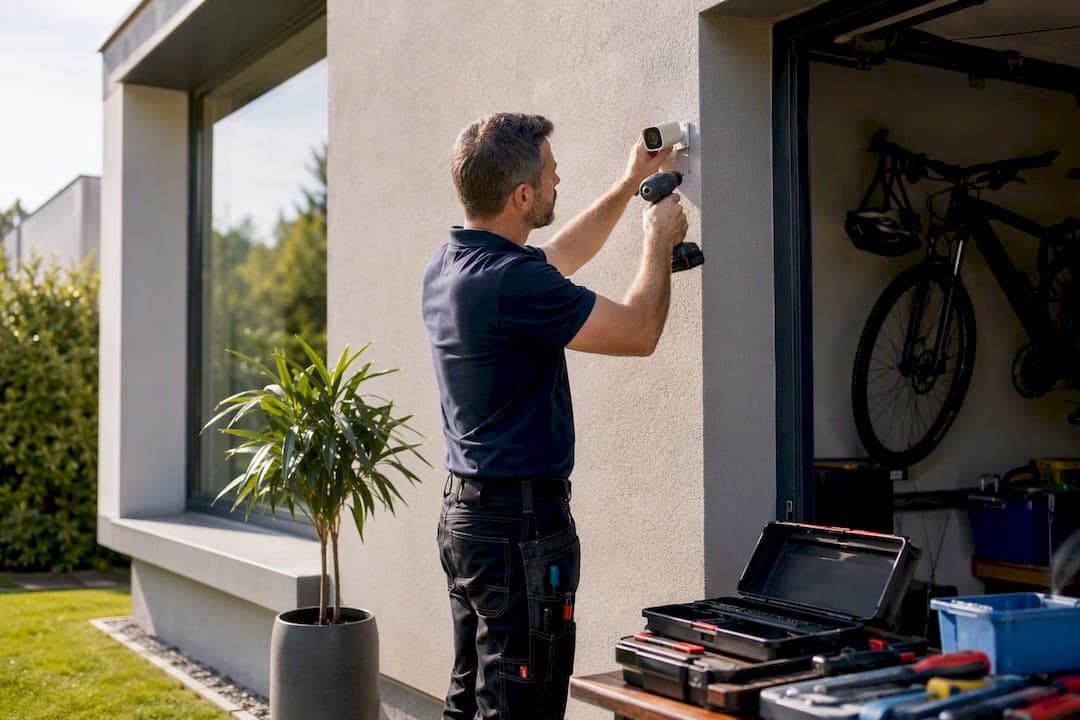
Cover your front door, back door, garage, and driveway first, then fill in the perimeter with overlapping angles. That's the whole rule. Every other decision in this guide, mounting height, lens choice, night settings, exists to serve one goal: capture a clear, usable face or plate at the points someone actually has to pass through to reach your house.
Prioritize identification over wide coverage. A camera that captures a blurry figure across the whole yard is worth less than one that clearly identifies a face at your front step.
- Top priority: front door, back/side doors, garage entry, driveway
- Mounting height: 8 to 10 feet for most residential setups
- Typical home baseline: 4 to 6 cameras for a standard house, more for larger lots
- Before anything permanent: test the position for at least 24 hours
One legal note before you grab the drill: don't point a camera into a neighbor's yard, window, or private space, even by accident. We'll cover the specifics later, but plan your angles with that in mind from the start.
Key Takeaways
Effective CCTV coverage depends on prioritizing identification at entry points before expanding to general perimeter coverage, with mounting height, overlap, and testing determining whether that footage is actually usable.
| Point | Details |
|---|---|
| Prioritize entry points first | Front door, back/side doors, garage, and driveway need identification-quality footage before anything else. |
| Mount at 8 to 10 feet | This height balances usable facial detail with tamper resistance for outdoor cameras. |
| Overlap by 10 to 20 percent | Overlapping adjacent camera fields of view eliminates blind gaps between units. |
| Test before final mounting | Run a 24-hour test with real obstructions, parked cars, foliage, in place to catch issues early. |
| Get a professional survey for full systems | Djcengineering's site survey and accredited installation approach supports a 98% first-visit fix rate across South East Queensland. |
Table of Contents
- Best Outdoor CCTV Camera Locations: Doors, Driveway, and Garage
- Where Should Indoor Cameras Go?
- How Many Security Cameras Does a Typical Home Need?
- Mounting Height, Tilt, and Lens Choice for Camera Placement
- Night Vision and Lighting Tips for Better Footage
- What Are the Privacy and Legal Rules for CCTV Placement?
- How to Test and Maintain Your Camera Setup
- What Professional Installers Know About Camera Placement
- Should CCTV Cameras Connect to Your Alarm and Smart Home System?
- Camera Placement for Watching Over Kids and Pets
- Why Installers Favor Identification-First Layouts
- Get a Professional CCTV Site Survey and Quote
- Sources
Best Outdoor CCTV Camera Locations: Doors, Driveway, and Garage
Your front door camera does more work than any other unit in the system. Most residential burglaries start there or through a ground-floor window, and identification data backs that up directly: ABS crime victimization figures consistently show front doors and first-floor windows as the dominant entry routes. Frame the approach path, not just the door itself. You want the camera to capture someone walking up the driveway or path before they're standing directly under the eave, where a hood or angle can hide a face.
Back and side doors deserve the same attention as the front, not an afterthought. Homeowners obsess over their entryway and forget the side gate or laundry door that's actually easier to force and harder to see from the street.
Garages that connect straight into the house function as an interior access point, not just a place to park. Crime Prevention Victoria's home security guidance treats attached garages as an extension of the home's interior security, and that means a camera watching both the vehicle bay and the internal door.
For driveways, angle the camera so plates cross the frame close to perpendicular rather than head on. A camera mounted straight above a long drive will catch motion but rarely a readable plate.
- Corner-mount cameras at property boundaries to catch fence lines and side yards
- Overlap adjacent cameras so no strip of yard sits outside every lens
- Check the view at dawn and dusk, when low sun causes glare that daytime testing won't reveal
Pro Tip: Walk your property at golden hour before you commit to a mounting spot. Low sun angles wreck footage in ways that noon daylight testing will never show you.
Where Should Indoor Cameras Go?
Indoor cameras belong in hallways, stairwells, and main living areas, the spaces someone has to cross to move through the house. Bedrooms and bathrooms are off the table, both for basic decency and because most jurisdictions treat cameras in those spaces as a privacy violation regardless of who owns the property.
Corner mounting near a ceiling gives the widest usable field of view for a hallway or stairwell, typically 7 to 9 feet up, low enough to read a face but high enough to avoid casual bumps and tampering.
- Mount in room corners for maximum coverage of doors and walkways
- Skip cameras in bedrooms, bathrooms, and other private spaces
- Use door and window sensors instead of cameras for rooms where you just need an alert, not footage
- Battery units are easier to place but need regular charging; plug-in cameras are more reliable for spots with constant traffic
If your Wi-Fi signal is weak in a back hallway or basement, a battery camera will drop frames or disconnect entirely. That's a wireless coverage problem, not a camera problem, and it's worth solving before you mount anything permanently.
How Many Security Cameras Does a Typical Home Need?
Camera count should follow your entry points, not a round number you saw in an ad.
- Small homes (one or two entries): 4 cameras covering front door, back door, and one wide-angle covering the side yard or garage.
- Medium homes with a garage and driveway: 5 to 6 cameras, adding dedicated driveway and garage-interior coverage.
- Larger properties or those with long driveways, outbuildings, or multiple gates: 7 or more cameras, with priority given to every point someone could enter unseen.
Map your property's actual access points first, then rank them: identification cameras (face or plate capture) at every entry, general coverage cameras for open yard space. Sensors on windows and side gates fill the gaps cheaply, so you're not buying a camera for every square foot. Most homeowners expand their system in phases anyway, starting with the front and back doors, then adding driveway and yard coverage once the budget allows.
Mounting Height, Tilt, and Lens Choice for Camera Placement
Identification and general coverage need different setups, and trying to make one camera do both jobs is where most DIY installs fall apart.
For identification, mount cameras roughly 8 to 10 feet high with a tilt between 15 and 30 degrees downward. That height keeps the lens out of easy reach for tampering while still capturing usable facial detail at typical walking distance. Go much higher than that and you're looking down at the top of someone's head, useless for identification even at 4K resolution.
Lens choice matters more than most buyers realize. Wide-angle lenses cover more ground but sacrifice per-foot detail, fine for a general yard-overview camera, poor for a plate or face capture point. A varifocal lens lets an installer dial in the exact field of view a spot needs, tighter for a driveway checkpoint, wider for an open side yard.
- Overlap adjacent camera fields of view by 10 to 20 percent to eliminate blind gaps between units
- Never rely on digital zoom to compensate for a wrong lens choice. It magnifies pixels, not detail
- For driveway plate capture, position the camera so the plate crosses the frame close to perpendicular to the road, not head on
One overlooked number: installers often specify pixel-per-foot targets when plate capture is a requirement, since resolution alone doesn't guarantee a readable plate if the distance or angle is wrong.
Night Vision and Lighting Tips for Better Footage
Most nighttime footage fails for one of two reasons: the wrong night vision mode or bad lighting geometry, not a weak camera.
Infrared night vision works well for general detection but produces grainy, colorless footage that's tough to use for identification. If you need to identify clothing color or a vehicle at night, a camera with a built-in spotlight or color night vision mode is worth the extra cost over a pure IR unit.
Backlighting kills more footage than any other single mistake. A camera pointed toward a streetlight, a neighbor's porch light, or the sunrise/sunset direction will silhouette anyone walking through the frame into an unreadable shadow.
- Pair cameras with motion-activated lighting to improve both identification and deterrence after dark
- Avoid pointing any camera toward direct glare sources, check this at both dawn and dusk, not just at night
- Watch for IR bounce off nearby windows, glass doors, or reflective siding, which washes out the image; a standoff mount or a slightly repositioned camera usually fixes it
What Are the Privacy and Legal Rules for CCTV Placement?
The core rule is simple: don't deliberately point a camera into a neighbor's yard, window, or private space. Incidental partial views happen with wide lenses and normally aren't a problem, but a camera aimed specifically at someone else's property is a different matter. Victoria Police's installation guidance makes this distinction clear for anyone mounting a residential system.
Audio recording carries more legal risk than video in most cases. Several state surveillance laws, including Victoria's Surveillance Devices Act, restrict recording private conversations without consent, so disable audio by default unless you have a specific, lawful reason to enable it.
- Use masking zones or angle adjustments on cameras that unavoidably catch a sliver of a neighboring property
- Post signage where required, and check your own state's privacy office guidance, Queensland's community privacy guide is a solid starting point, before finalizing audio settings
- Talk to a legal professional if a dispute with a neighbor arises rather than trying to resolve it through camera adjustments alone
How to Test and Maintain Your Camera Setup
Don't mount permanently until you've confirmed the position actually works.
- Run a 24-hour test in the exact planned spot to check day and night performance and catch false motion triggers from moving branches or traffic.
- Test with your usual obstructions in place, a car parked in its normal spot, foliage at full growth, since these reveal blind spots a clear test run won't show.
- Confirm Wi-Fi reliability, recording consistency, and basic tamper resistance, run cabling through conduit where exposed.
- Set a maintenance rhythm: clean lenses seasonally, check firmware updates, and re-test after any landscaping or structural change nearby.
Pro Tip: Park your car in its actual spot during testing, not the driveway's open end. Installers catch more blind spots this way than any other single check.
What Professional Installers Know About Camera Placement
Most service calls we see at Djcengineering trace back to planning mistakes, not broken hardware. Wrong angles, missed overlap, and cameras mounted before anyone tested the position in real conditions.
A proper site survey catches these problems before installation, mapping sightlines, checking for glare, and running cable paths that won't need rework later. That groundwork is a big part of why a properly scoped install can hit a 98% first-visit fix rate instead of requiring a return trip.
- Concealed cabling and managed switches matter most for multi-camera systems where uptime and clean sightlines both count
- PoE installations simplify power delivery for cameras mounted away from outlets, common on garages and detached structures
- DIY works fine for a single front-door camera; a full-property system with overlap and structured cabling benefits from professional planning
Poor planning, not hardware, is the single biggest cause of security camera service calls. Wrong heights, wrong angles, and missing overlap show up in the field far more often than a faulty unit does.
Should CCTV Cameras Connect to Your Alarm and Smart Home System?
A camera that operates on its own tells you something happened. A camera integrated with your alarm and smart home setup tells you something is happening, right now, and can act on it.
Linking cameras to a monitored alarm system lets a triggered door sensor pull up the matching camera feed automatically, so you're not scrubbing through hours of footage to find the moment that mattered. Motion at the back door can trigger both a recording and a notification in the same instant, cutting the lag between an event and your awareness of it.
Smart home integration adds a layer most homeowners underuse: automated lighting tied to camera motion detection. A driveway camera that flips on the porch light the instant it detects movement does double duty as both a deterrent and better footage. Smart locks paired with a front-door camera let you visually confirm who's there before granting access remotely, useful for deliveries or trades access when you're not home.
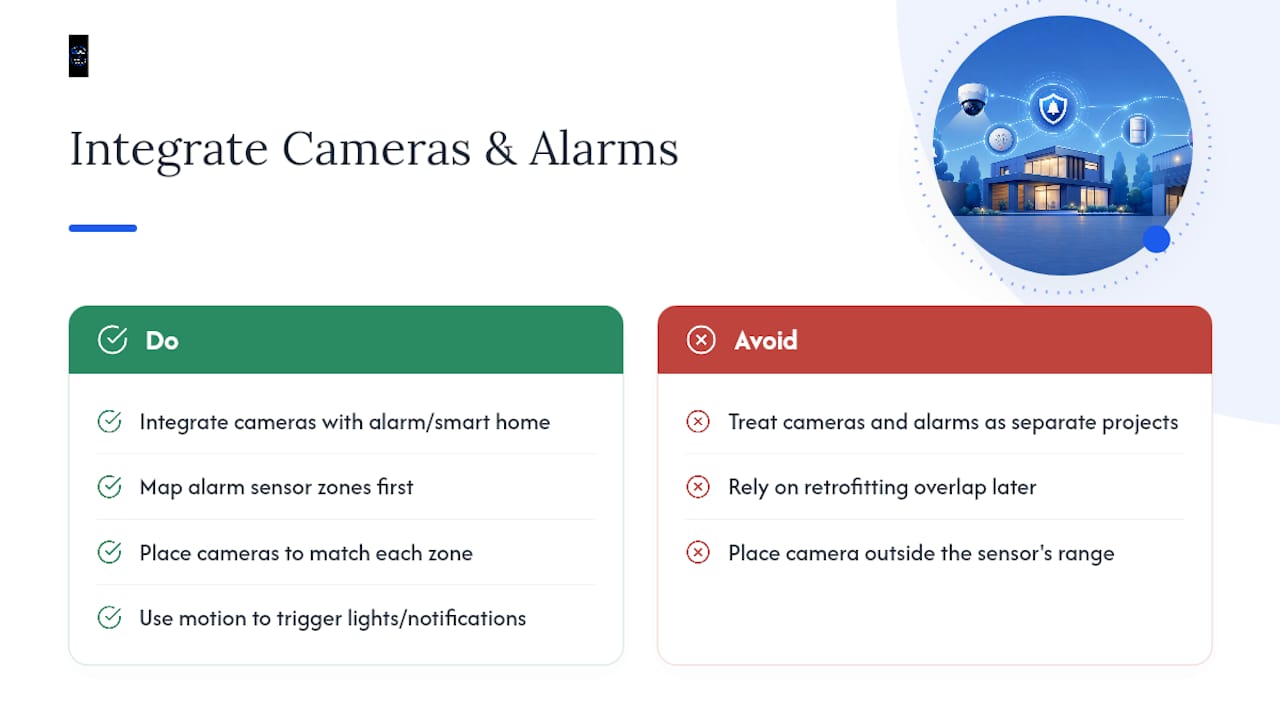
The placement implications matter here too. A camera meant to trigger an alarm zone needs to cover that zone's actual sensor range, not just a general area nearby, or you'll get camera footage that doesn't match what set off the alert. When you're planning a system that will tie into alarms or automation, map the sensor zones first, then place cameras to match rather than treating the two systems as separate projects. Retrofitting overlap between an existing alarm layout and a camera system installed years later is far more work than planning both together from the start.
Camera Placement for Watching Over Kids and Pets
Family monitoring calls for a different placement logic than perimeter security. You're not trying to identify a stranger's face at the front gate, you're trying to see whether the toddler is near the pool or the dog got into the pantry.
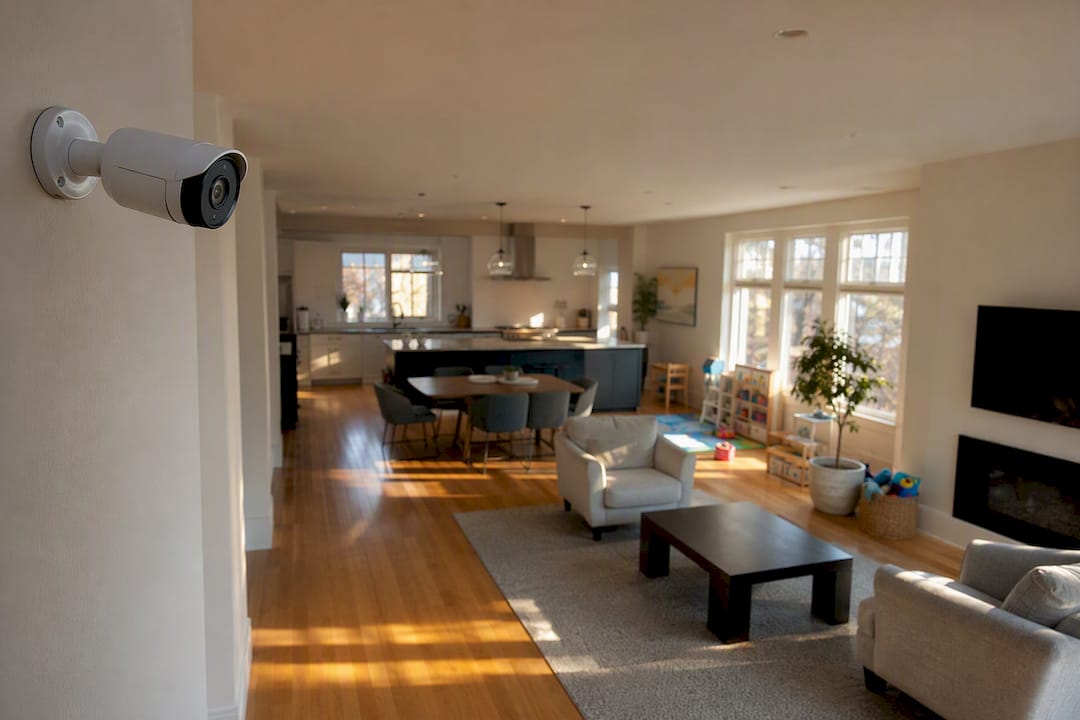
Living rooms, kitchens, backyards, and pool areas are the priority zones for family and pet monitoring, anywhere unsupervised time actually happens. A single wide-angle indoor camera covering an open-plan living and kitchen area usually beats several narrow ones, since you want a full view of the room rather than a tight identification frame.
Pool and backyard cameras deserve particular attention if you have young kids. Position the camera to cover the pool's edge and gate access point, not just the general yard, since drowning risk is about proximity to water, not general outdoor activity. A camera mounted to catch the gate latch will tell you faster whether a child has wandered toward the pool unsupervised than one aimed at the far fence line.
Keep these cameras out of bedrooms and bathrooms, the same privacy boundary that applies to general indoor placement holds here too. For pets specifically, a lower mounting angle, closer to 5 or 6 feet rather than the usual 8 to 10, often works better since it captures a dog or cat at their actual eye level rather than looking down at a shape crossing the floor.
Why Installers Favor Identification-First Layouts
Most homeowners buy cameras first and figure out placement later, which is backward. The mistake I see most often isn't a cheap camera, it's a good camera mounted somewhere that never captures a usable face.
Planning the layout before buying anything, survey the property, identify choke points, then install, is the difference between footage you can hand to police and footage that just confirms something happened. Djcengineering builds every system around that survey, install, test sequence for exactly this reason.
Get a Professional CCTV Site Survey and Quote
A DIY camera kit gets you motion alerts. What it usually doesn't get you is footage that actually identifies who was at your door, because that depends on angles, height, and overlap most homeowners have never had reason to learn. Djcengineering closes that gap with accredited installation backed by a 98% first-visit fix rate across South East Queensland, meaning your system gets scoped and installed correctly the first time, not adjusted over three follow-up visits.

The team handles the parts that trip up DIY installs: a proper site survey to map entry points and sightlines, 4K CCTV systems with AI-assisted detection, concealed structured cabling so runs aren't exposed to tampering or weather, and Wi-Fi design when camera reliability depends on signal strength rather than just mounting position. For properties adding managed switches or PoE runs across multiple cameras, the networking and structured cabling services cover that groundwork too.
If your current setup has blind spots you can't explain, or you're planning a system from scratch, request a site survey and quote through the CCTV, alarms, and access control page to get placement mapped by someone who does this daily, not by trial and error.
Sources
- Crime Victimisation, Australia — ABS
- Security
- Camera surveillance, video and audio recording — Office of the Information Commissioner Queensland
Recommended
- CCTV Installation Gold Coast: The Technical Checklist for High-Performance Security | DJC Engineering
- CCTV Cameras Installation Brisbane: How to Engineer a High-Performance Security System | DJC Engineering
- Commercial CCTV Security: A Professional Guide to High-Performance Surveillance | DJC Engineering
- Construction Site Cameras: The Buyer's Guide for 2026