
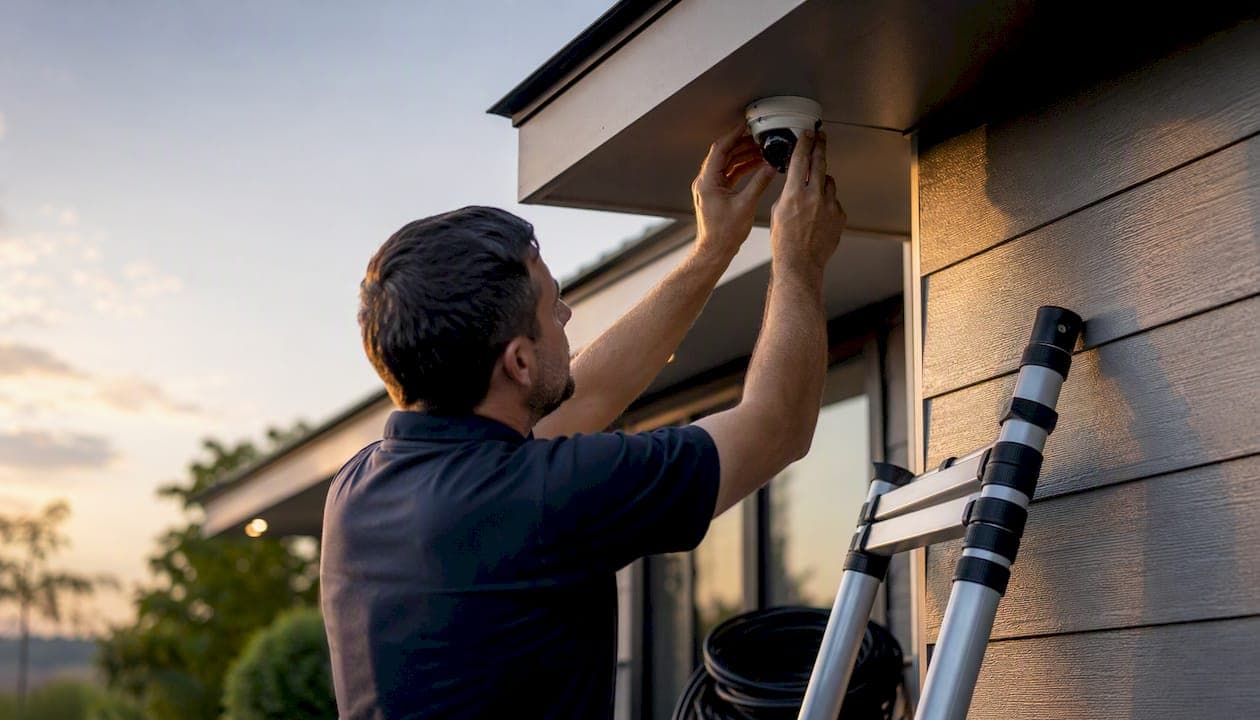
Most homes need between 4 and 6 security cameras to cover the locations that matter. Apartments and condos typically get by with 1–2. Small houses (under 1,500 sq ft) usually land at 2–4. Medium homes run 4–6, and larger properties with detached structures or extended lots often need 6 or more. ConsumerAffairs' guidance puts the average homeowner at roughly 4 cameras for reasonable coverage.
If you're starting from zero, a 3–4 camera starter setup covers the highest-priority spots:
- Front door/porch (1 camera, ideally a doorbell cam or a wide-angle fixed unit)
- Driveway or main approach (1 camera covering the vehicle entry and street view)
- Back door or rear patio (1 camera on the primary secondary entry)
- Garage or side entry (1 camera, combined with the driveway view where possible)
The core principle: start lean, cover every entrance and approach first, then add cameras for blind spots and outbuildings. CNET's reporting makes the point clearly — more cameras do not automatically mean better security. Placement and camera quality matter far more than raw count.
Key Takeaways
Most homeowners need 4–6 cameras to cover their property's critical entrances and approaches, with a 3–4 camera starter setup covering the front door, driveway, back door, and garage as the highest-priority locations.
| Point | Details |
|---|---|
| Start with 3–4 cameras | Cover front door, driveway, back door, and garage before adding any other locations. |
| Match count to home size | Apartments need 1–2; small houses 2–4; medium homes 4–6; large properties 6 or more. |
| Quality over quantity | A single 4K wide-angle camera often covers what two lower-resolution units would, reducing total system complexity. |
| Plan before you buy | Map entrances and approaches first, then assign cameras — never buy first and plan second. |
| Know when to hire a pro | Concealed cabling, alarm integration, or systems beyond 4 cameras justify a professional site survey. |
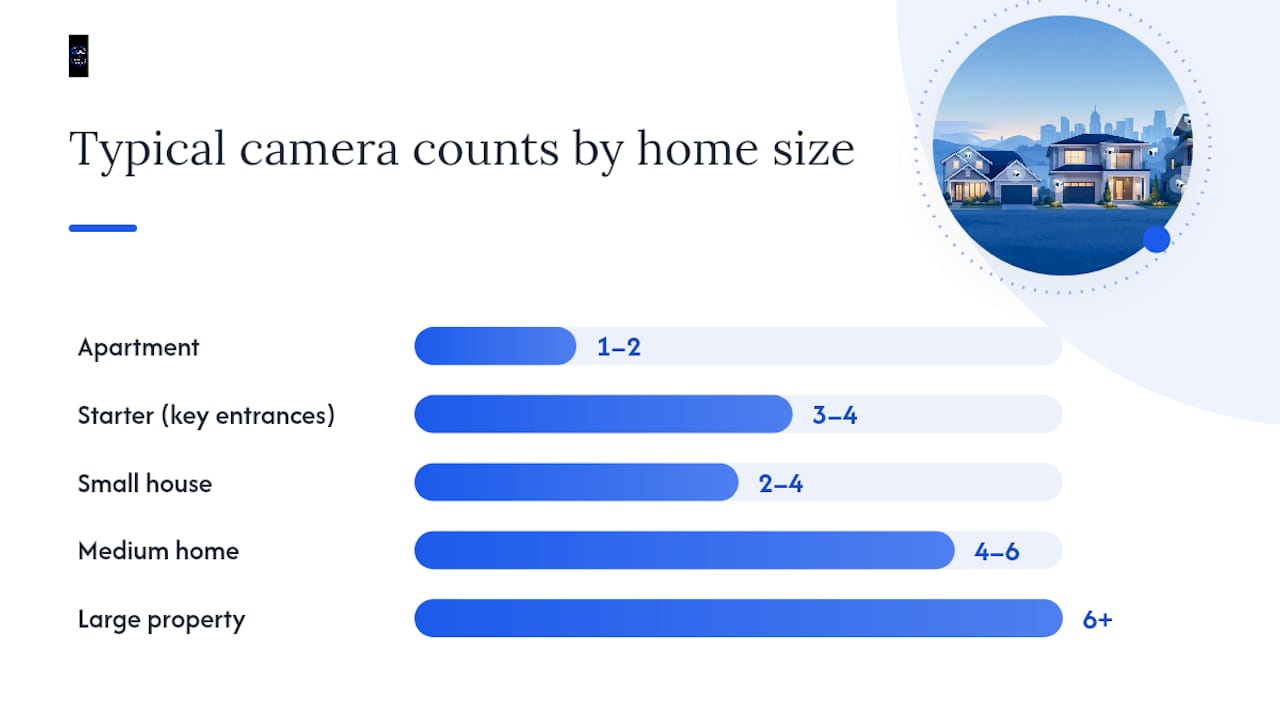
Table of Contents
- How do you figure out how many cameras your home needs?
- Typical camera counts by home type and what drives those ranges
- Where exactly should you place cameras, and how many per location?
- Which camera features change how many cameras you actually need?
- How do you calculate the exact number for your property?
- Monitoring, storage, and maintenance after you choose your camera count
- What US privacy and recording laws apply to home security cameras?
- When does hiring a professional installer actually make sense?
- How cameras integrate with your existing security systems and smart home devices
- The mistake most homeowners make when buying security cameras
- Sources
How do you figure out how many cameras your home needs?
No two properties are identical, so the right number of cameras depends on a handful of factors that either push the count up or let you trim it down.
Factors that raise your camera count:
- Large lot size or irregular property shape with multiple blind spots
- High number of entry points (doors, gates, basement windows)
- Poor natural lighting or dense landscaping that limits sightlines
- Detached structures: garages, sheds, pool houses, or guesthouses
- Higher neighborhood crime risk (check local FBI UCR burglary data for context)
- Valuables stored in outbuildings or vehicles parked outside
- Need for identification-quality footage rather than general deterrence
Factors that let you reduce camera count:
- Compact lot with clear sightlines from a single vantage point
- Fewer entry points (a condo with one door and a shared lobby)
- High-resolution cameras with wide fields of view that cover more area per unit
- PTZ or pan/tilt cameras that can monitor multiple zones from one mount point
- Existing alarm system or access control that handles some deterrence
Arcdyn's step-by-step guide frames it well: there is no single fixed number. The right count comes from mapping critical areas, not from a formula applied blindly.
Pro Tip: Walk your property from the street and identify every "approach line" — the natural paths someone would take to reach a door or window. Cover those choke points first. A camera watching a 30-foot driveway approach is worth more than three cameras pointed at walls.
Typical camera counts by home type and what drives those ranges
The table below gives a practical starting point. These are ranges, not prescriptions. Your layout, lot, and camera specs will shift the final number.
The 1-per-500-sq-ft rule gets cited often as a planning shortcut. It works as a rough sanity check for indoor coverage, but it breaks down quickly outdoors. A single well-placed exterior camera can cover a 40-foot driveway regardless of whether the house is 1,200 or 2,400 sq ft. CCTVinfo's coverage calculator uses a more practical baseline: one camera per side of the building for most residential cases. That approach often produces a more accurate count than square footage math alone.
Common placement priorities by home type:
- Apartment/condo: Front door, package drop area (package theft is a growing concern in multifamily buildings — see this guide to reducing package theft for placement ideas)
- Small house: Front door, driveway, back door
- Medium house: Front door, driveway, back door/patio, garage, one side yard
- Large property: All of the above plus detached structures, rear yard perimeter, secondary gate or fence line
Where exactly should you place cameras, and how many per location?
Knowing the total count is only half the job. Placement determines whether those cameras actually capture useful footage.
Exterior locations
Front door and porch. One camera is usually enough, positioned 8–10 feet high and angled down at 15–30 degrees. A doorbell camera handles this well for most homes, though a separate wide-angle unit gives better coverage of the full porch width.
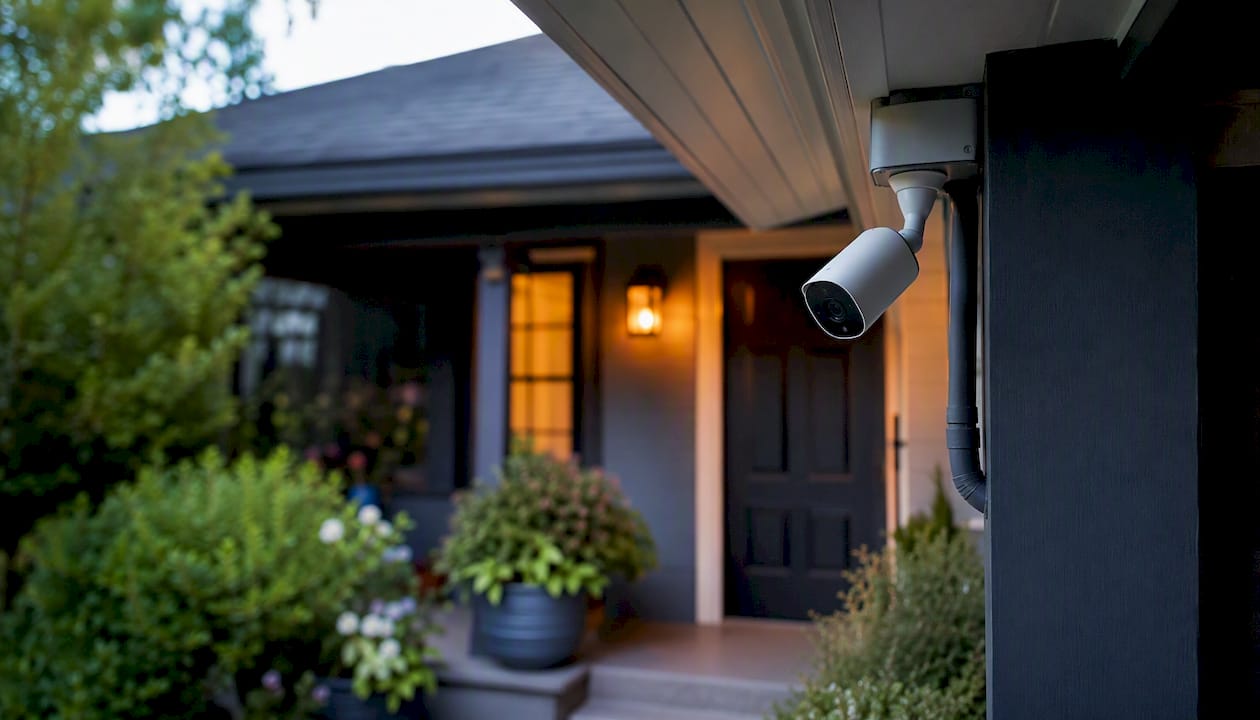
Driveway and main approach. One camera covering the vehicle entry point and ideally the street view. Mount it high enough to capture license plates without backlighting from headlights — avoid pointing directly into the sun's path.
Back door and patio. One camera. This is the second most common entry point for break-ins, and it's often the most neglected. A wide-angle unit covering the door and the patio or deck area handles most scenarios.
Garage exterior. One camera, often shared with the driveway view if the garage faces the street. If the garage is detached or side-facing, it needs its own dedicated unit.
Side yards. One camera per side yard that isn't already covered by the front or rear units. Many homes can skip this with good corner placement on the front and back cameras.
Backyard. One to two cameras depending on yard depth and fence line. A large open yard may need two cameras at opposite corners to eliminate blind spots.
Detached structures. One camera per structure (shed, workshop, pool house). These are high-value targets and often sit outside the coverage zone of the main house cameras.
Interior locations
Most homeowners don't need many interior cameras. The main entry hallway, living area, and garage interior are the practical priorities. Avoid placing cameras in bedrooms or bathrooms — beyond the obvious privacy concerns, it creates legal exposure (more on that in the privacy section below).
Mounting and angle tips
- Mount exterior cameras at 8–10 feet. Lower than 7 feet and they're easy to tamper with; higher than 12 feet and the downward angle makes face identification harder.
- Avoid backlighting. Don't point cameras directly at windows or bright exterior light sources.
- Wide-angle lenses (90–130 degrees) cover more area but lose detail at distance. Narrow lenses (60 degrees or less) give better identification quality for longer approaches.
- Overlap coverage zones slightly at high-priority areas like the front door. A gap in coverage there is the one you'll regret.
Privacy note: Keep camera angles on your own property. Pointing a camera into a neighbor's yard, driveway, or windows can violate their reasonable expectation of privacy under US law, regardless of where the camera is physically mounted.
Which camera features change how many cameras you actually need?
The right camera spec can reduce your total count. The wrong one forces you to add more units to compensate.
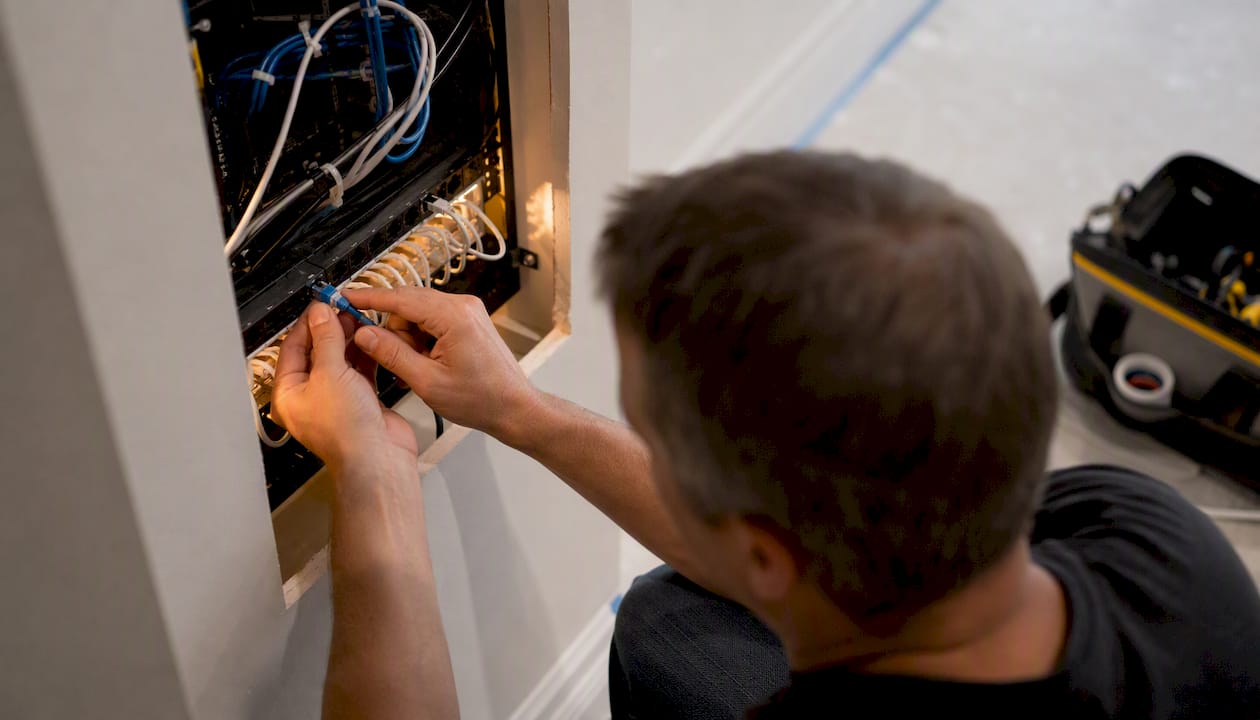
Wired vs. wireless. Wired cameras (PoE, or Power over Ethernet) are more reliable, don't depend on Wi-Fi signal strength, and support higher sustained bitrates for 4K recording. Wireless cameras are faster to install but add Wi-Fi load and can drop frames during congestion. For a multi-camera system, wired is the better long-term choice. Djcengineering's structured cabling and PoE planning covers this in detail for homeowners considering a permanent installation.
Resolution. A properly placed 4K camera often replaces two or three lower-resolution units. Secureview's planning guide notes that a well-positioned 4K camera can cover the work of multiple poorly placed lower-resolution cameras. At 1080p, you may need tighter placement to get identification-quality footage. At 4K, a single wide-angle unit can cover a broader zone while still resolving faces and license plates.
Field of view. Wide-angle lenses (100–130 degrees) are good for porches and entry points where subjects pass close to the camera. Narrower lenses work better for long driveways or approaches where you need detail at 30–50 feet. Matching lens to location reduces the number of cameras needed to cover a given area.
PTZ cameras. Pan/tilt/zoom units can monitor multiple zones from one mount point, which sounds appealing. In practice, residential PTZ cameras require active monitoring or preset patrol routes to be useful — they don't replace fixed cameras at critical points. They work well as supplemental units for large yards or parking areas.
Night vision. Standard IR night vision produces black-and-white footage. Color night vision (using a starlight sensor or a white-light illuminator) produces color footage in low light, which is significantly more useful for identification. For front-door and driveway cameras, color night vision is worth the extra cost.
Weather rating. Exterior cameras need at minimum an IP65 rating. IP67 or IP68 is better for exposed locations or areas with heavy rain and humidity.
Storage. Local NVR/DVR storage avoids monthly subscription fees and keeps footage on-site. Cloud storage offers off-site redundancy but adds recurring costs that scale with camera count. Many homeowners use a hybrid: local NVR as primary, cloud as backup for critical cameras only.
Pro Tip: Before buying six budget cameras, price out four mid-range 4K units instead. The total cost is often similar, the footage is dramatically better, and you'll spend less time managing false alerts and firmware updates.
How do you calculate the exact number for your property?
A short, repeatable walkthrough beats any formula. CCTVplanner's systematic method recommends mapping critical zones first, then adding overlap — not the other way around.
- List every entrance and approach. Walk the perimeter and write down every door, gate, window accessible from ground level, and the natural path someone would take to reach each one. Include the driveway, any pedestrian paths, and fence openings.
- Assign one camera per entrance or approach. Each item on your list gets one camera. This is your baseline count.
- Add cameras for blind spots. Walk the property again and identify any area not covered by step 2. Side yards, the rear fence line, and detached structures are the usual gaps. Add one camera per uncovered zone.
- Apply the 1-per-500-sq-ft rule as a sanity check. Divide your home's interior square footage by 500. If your entrance-based count is significantly lower than this number, you may be under-covering interior common areas. If it's higher, you're probably over-counting.
- Adjust for camera capability. If you're using 4K wide-angle cameras, one unit may cover what two 1080p units would. Reduce your count accordingly where a single high-spec camera can handle a zone.
- Check your monitoring and storage capacity. An NVR with 8 channels caps you at 8 cameras. A Wi-Fi router with limited bandwidth may struggle with 6 simultaneous 4K streams. Confirm your infrastructure supports the count before finalizing.
Quick property checklist:
- Front door covered? ☐
- Driveway/main approach covered? ☐
- Back door covered? ☐
- Garage (exterior) covered? ☐
- Side yards covered or confirmed not needed? ☐
- Detached structures covered? ☐
- Backyard blind spots addressed? ☐
- Interior common areas covered (if desired)? ☐
- NVR channel count and Wi-Fi bandwidth confirmed? ☐
Monitoring, storage, and maintenance after you choose your camera count
Getting the count right is only part of the job. A system with too many cameras and no clear monitoring plan creates noise, not security.
Monitoring options:
- Self-monitoring via a smartphone app works well for most homeowners with 4–8 cameras. Motion alerts are manageable if you configure zones properly.
- Professional monitoring adds a response layer and is worth considering if you travel frequently or have a larger system. It pairs well with an integrated alarm — Djcengineering's back-to-base alarm guide covers how cameras and alarms work together.
- Local NVR with alerts gives you full control, no subscription, and footage that stays on your property. The trade-off is that you're responsible for reviewing and managing it.
Bandwidth and storage planning:
Residential 4K H.265+ motion-only recording typically consumes roughly 3–8 GB per camera per day in real-world conditions. A 4-camera system on motion-only recording uses approximately 12–32 GB/day, which a 2TB NVR drive handles for 60–160 days before overwriting. Continuous recording roughly triples those figures. Use H.265+ compression and motion-triggered recording to keep storage and bandwidth manageable.
Maintenance:
- Clean camera lenses every 3–6 months, more often in dusty or high-pollen environments.
- Check firmware updates quarterly. Manufacturers push security patches that matter.
- Review camera angles after any landscaping changes — a tree that grew over summer can block a previously clear sightline.
- Test night vision and motion detection after daylight saving time changes, when lighting conditions shift.
False alert management:
Motion zones are the single biggest lever. Set tight polygonal zones around the areas you actually care about (the door, not the whole yard). Smart detection (person, vehicle, package) dramatically reduces false alerts compared to pixel-based motion detection.
Cost note: Each additional camera adds installation cost, a potential NVR channel, and possibly a higher cloud subscription tier. A 4-camera system is meaningfully cheaper to run long-term than an 8-camera system, which is one more reason to start lean and expand only where coverage gaps actually exist.
What US privacy and recording laws apply to home security cameras?
Home security cameras are legal in the US, but placement and audio recording carry real legal constraints homeowners should understand before installing.
Expectation of privacy: Under US law, people have a reasonable expectation of privacy in spaces where they would reasonably expect not to be observed — bedrooms, bathrooms, and changing areas. Recording in these spaces, even in your own home, creates serious legal exposure. Outdoors, public-facing areas (your driveway, front yard, street view) are generally fair game. The line is crossed when a camera captures a neighbor's private space — their backyard, interior rooms visible through a window, or their driveway in a way that constitutes surveillance of their private activity.
Audio recording is more complicated. Federal law (the Electronic Communications Privacy Act) requires one-party consent for audio recording, meaning you can record conversations you're part of. But many states require all-party (two-party) consent for recorded conversations. California, Florida, Illinois, and Washington are among the states with stricter audio consent laws. If your cameras record audio in a shared space or near a property line, check your state's specific rules before enabling audio. When in doubt, disable audio recording on exterior cameras or consult an attorney.
Practical steps:
- Post a visible notice at entry points if cameras cover shared or semi-public areas (a shared driveway, a common entrance).
- Angle cameras to avoid capturing neighbors' private spaces, even if the camera is on your property.
- Check your state attorney general's website for state-specific recording consent rules before enabling audio.
This is a brief summary of general principles, not legal advice. State laws vary, and a local attorney can confirm what applies to your specific installation.
When does hiring a professional installer actually make sense?
DIY camera installation works fine for a doorbell cam or a single wireless unit. Once the system grows past 3–4 cameras, or involves concealed cabling, the case for professional installation gets stronger fast.
Situations where a pro pays off:
- Properties with more than 4 cameras, multiple entry points, or complex lot layouts
- Concealed cabling requirements (running cable through walls, attics, or conduit)
- Integration with an existing alarm system, access control, or smart home platform
- High-bandwidth requirements where a Wi-Fi design and install is needed to support multiple 4K streams
- Insurance or compliance conditions that require certified installation documentation
- Rural or large properties where connectivity planning (Starlink, NBN, mesh Wi-Fi) is part of the security design
What a professional site survey should cover:
- A coverage map showing camera placement, angles, and overlap zones
- Cable routes and conduit planning for concealed or weatherproof runs
- Power and PoE switch planning (how many ports, what switch capacity)
- NVR channel planning with headroom for future expansion
- Wi-Fi heatmap if wireless cameras are part of the design
- Redundancy planning: what happens if one camera or the NVR goes offline
Questions to ask any installer before signing:
- Do you subcontract any part of the installation?
- What is your first-visit fix rate?
- What warranty covers the installation labor and hardware?
- Does the NVR have spare channel capacity for future cameras?
- What does ongoing maintenance or a support agreement include?
Djcengineering handles CCTV, alarms, and access control across South East Queensland with a 98% first-visit fix rate and no subcontractors. Every installation is scoped with a site survey so the camera count and placement are confirmed before a single cable is run.
How cameras integrate with your existing security systems and smart home devices
A camera system that works in isolation is useful. One that talks to your alarm, access control, and smart home platform is significantly more useful.
Modern NVR platforms (Hikvision's iVMS, Dahua's SmartPSS, and others) support alarm input triggers, meaning a door sensor or motion detector can automatically start recording on a specific camera channel. That integration eliminates the gap between "something happened" and "the camera was already recording it."
Access control integration takes it further. A camera paired with a smart lock or intercom at the front door lets you see, speak to, and grant access to a visitor from your phone. Djcengineering's access control and entry-point engineering covers how these systems work together in a residential context.
On the smart home side, platforms like Google Home, Amazon Alexa, and Apple HomeKit support camera integration for live view and motion alerts. The practical value is convenience — a doorbell camera that triggers a smart display in your kitchen, or a motion alert that turns on smart lights in the backyard. These integrations work best when the camera system is designed with them in mind from the start, not retrofitted after the fact.
One planning note: the more devices you integrate, the more your home network needs to support them. A 6-camera 4K system plus smart locks, sensors, and a smart hub can push significant bandwidth through a residential router. A properly designed mesh Wi-Fi system or a dedicated IoT VLAN keeps camera traffic from competing with everything else on the network.
The mistake most homeowners make when buying security cameras
The most common pattern I see: a homeowner buys six budget cameras from a big-box store, installs them wherever there's a convenient power outlet, and ends up with a system that covers three walls of the garage and misses the back door entirely.
The second most common: they buy the cameras first and plan the placement second. By the time they realize the driveway camera needs a 60-foot cable run through the attic, the budget is gone.
The fix is straightforward. Walk the property first. Map every entrance and approach. Write down the camera count that coverage requires. Then buy cameras that match that plan, prioritizing resolution and field of view over quantity. Four well-placed 4K cameras with proper cabling will outperform eight cheap wireless units every time — and they'll produce footage that's actually useful if something happens.
The other thing worth saying: Wi-Fi and power planning are not afterthoughts. A camera that drops offline because it's at the edge of the Wi-Fi range, or that goes dark in a power outage without a UPS on the NVR, is not a security camera. It's a false sense of security. Plan the infrastructure before you commit to a camera count.
Sources
- How Many Security Cameras Do I Really Need for My House? - CNET
- How Many Security Cameras Do I Need? - ConsumerAffairs
- CCTV Coverage Calculator: How Many Cameras (2026)
- How Many Security Cameras Do I Need? A Step-by-Step Guide | Arcdyn
Recommended
- Construction Site Cameras: The Buyer's Guide for 2026
- Video Surveillance Security Cameras: The Technical Guide to Modern Property Protection | DJC Engineering
- Commercial CCTV Security: A Professional Guide to High-Performance Surveillance | DJC Engineering
- Security Camera Installation Gold Coast: High-Performance Surveillance Engineering | DJC Engineering