
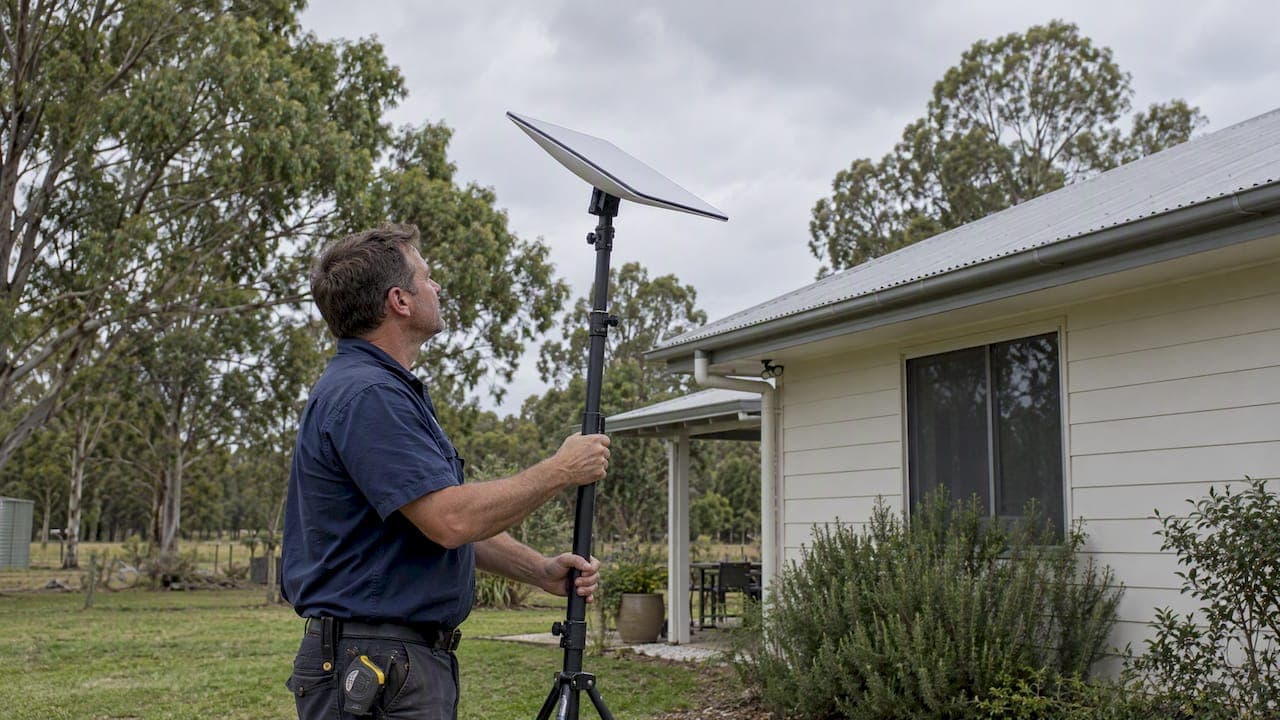
For most homes, a wall mount or pipe/pole adapter fitted after an obstruction scan gives the best balance of signal and simplicity, with pivot, ridgeline, roof rack, and ground mounts covering the rest of the common scenarios. Before buying anything, confirm which mount options are compatible with your specific Starlink terminal model and run the obstruction tool in the Starlink app to map your sky view. If your roof is steep, your site is wind exposed, or you're facing a long cable run, it's worth calling in a professional installer rather than guessing.
TL;DR:
- Use the Starlink app to compare sky clearance at two or three candidate locations, then check whether the clearest spot allows a practical cable route.
- Check your terminal model against each mount’s compatibility listing before ordering, because Starlink mounts do not fit every dish generation.
- Ballast mounts avoid roof holes on metal or flat roofs, but taller masts increase roof load; clay tiles can crack under concentrated weight.
- For vehicle installs, point the mount arrow forward, match the grip pad to the crossbar, and recheck clamps because vibration can loosen them.
- Hire a professional for wind exposed sites, steep or complex roofs, or long cable runs; ask for a site survey and post installation signal test.
Table of Contents
- The Main Starlink Mount Types and What They're For
- How to Choose the Right Mount and Find the Best Placement
- Mounting Starlink on a Vehicle or Roof Rack
- Non-Penetrating and Ballast Roof Mounts
- What a Professional Installer Checks Before Mounting
- Local Regulations and Permits for Commercial Installs
- Maintenance and Inspection for Commercial Starlink Mounts
- Why We Often Recommend a Professional Install for Exposed Sites
- Getting Your Starlink Mount Installed Properly
- FAQ
- Sources
The Main Starlink Mount Types and What They're For
Starlink sells several official mount categories, and the right one depends on your roofline, your terminal model, and how permanent you want the install to be. According to Starlink's standard accessories guide, compatibility varies by model, so always check your specific terminal before ordering a mount.
- Wall mount: bolts directly to a fascia, wall, or eave and suits homes with a clear, unobstructed sightline near the roofline; overhang and surface strength matter more than roof type.
- Pivot mount: designed for sloped roofs, letting the dish pivot to the correct elevation angle even when the roof pitch is steep.
- Pipe or pole adapter: clamps onto an existing pole or mast, generally fitting pipe diameters between 31 and 63.5 millimeters, and works well when you already have a satellite pole or want extra height.
- Ridgeline or non-penetrating mount: sits on the roof ridge using ballast weight instead of screws, a common choice for metal roofs where owners want to avoid drilling.
- Roof rack or mobility mount: clamps onto vehicle crossbars or roof rails for caravans, RVs, and moving installs.
- Ground or X-frame mount: a freestanding tripod-style base for temporary setups, rentals, or sites where roof access isn't practical.
Each option has practical limits worth knowing before you commit. Wall mounts need enough clear overhang to avoid shading the dish from nearby eaves. Pivot mounts are only useful once your roof slope actually blocks a flat-mount's field of view. Ridgeline and ballast mounts work best on roofs that can bear the extra point load, which rules out some older or lightweight structures. None of these mounts are rated for extreme wind events, and the v5 installation guide recommends tethering the dish in storm-prone or highly exposed locations as extra insurance against wind lift.
How to Choose the Right Mount and Find the Best Placement
Picking a mount is really a two-part decision: what fits your terminal, and what fits your roof. Starting with the sky view saves you from buying hardware you can't use.
- Open the Starlink app's obstruction tool and scan from two or three candidate spots, noting the sky clearance at each.
- Match your Starlink terminal model to the mount's listed compatibility rather than assuming a mount that fit an older dish will fit a newer one.
- Assess your roof material and slope: flat concrete tile, Colorbond steel, and timber shingle all behave differently under a penetrating or ballasted mount.
- Weigh penetrating versus non-penetrating options; penetrating mounts need proper flashing and sealant to stay watertight, while non-penetrating mounts avoid holes but add weight.
- Check wind exposure and coastal corrosion risk, since tethering and corrosion-resistant fixings matter more near the coast or on exposed ridgelines.
- Plan the cable route to a power source, including any conduit runs, and decide whether you need a roofer or electrician for parts of the job.
Pro Tip: Mark your top two obstruction-free locations in the app before you buy a mount, so you have a backup if the first spot turns out to have a cable-routing problem.
For rural properties where trees and long driveways complicate the obstruction picture, it helps to read through dedicated guidance on Starlink for farms before settling on a site.
Mounting Starlink on a Vehicle or Roof Rack
Mobility installs follow a stricter set of rules than a fixed home mount, mainly because vibration and wind load change the math. The roof rack and rail mount guide lays out the key steps.
- Point the mount's arrow toward the front of the vehicle so the dish aligns correctly once powered on.
- Match the grip pad to your crossbar's thickness and width, using the shorter pad side for narrower bars and the longer side for wider ones.
- Tighten the clamp fully and recheck it periodically, since vibration from driving can loosen hardware over time.
- Follow local transport and maritime regulations for anything mounted on a moving vehicle or boat.
A mobility mount suits frequent movers, while a removable roof-rack install fits people who mostly park in one place but still want flexibility.
Non-Penetrating and Ballast Roof Mounts
Ballast mounts hold the dish in place with weight instead of screws, which avoids creating new roof penetrations altogether. They're a sensible pick for metal or flat roofs, but the ballast and mast height both add point load, so a wider footprint mount is often the better choice when you need extra clearance to clear an obstruction.
- Taller masts need more ballast, which increases pounds per square foot on the roof, according to Baird's non-penetrating mount specifications.
- Clay tile roofs are generally a poor fit for ballast mounts because the tiles can crack under concentrated weight; a ridge or peak mount is often a better workaround on steep tiled roofs.
- Rubber pads under the base protect roofing material from scuffing or cracking.
- A roofer consultation is worth the cost on older roofs or anywhere you're unsure about load capacity.
For high or exposed roof sites where ballast and wind both become concerns, our high-site mount guidance covers the extra precautions worth taking.
What a Professional Installer Checks Before Mounting
A proper site survey goes beyond a single obstruction scan. We map obstructions from several candidate locations, compare the sky-clearance readings, and check roof access and the practical cable path before settling on a spot.

The mistakes we see most often in DIY installs are poor sealing around roof penetrations, mounts installed facing the wrong orientation, missing tethers on exposed sites, and cable runs left exposed to weather. A solid quote should spell out the scope of work, the materials used, the testing performed after mounting, and whether warranty or maintenance support is included.
Pro Tip: Ask any installer for a site diagram and post-install signal test results as part of the handover, not just a photo of the finished mount.
Local Regulations and Permits for Commercial Installs
Commercial and industrial properties often carry different rules than a standalone house, and it pays to check before drilling into a shared or heritage-listed building. Strata-titled commercial buildings, leased premises, and multi-tenant sites frequently require written approval from a body corporate or landlord before any roof or wall penetration, satellite equipment included.
Local council building codes can also apply to rooftop structures above a certain height or weight, particularly on ballasted mounts that add meaningful point load to a commercial roof. Industrial sites with existing communications infrastructure, such as rooftop antennas or solar arrays, may also need a site-specific assessment to avoid interference or structural conflicts.
None of this is a reason to skip a mounting job, but it does mean the paperwork stage matters as much as the hardware stage on a commercial property. Confirming lease terms, body corporate rules, and any local permit requirements before scheduling an install avoids a mount that has to come back down. Business owners juggling multiple sites or higher bandwidth needs may also want to look at broader Starlink for business considerations alongside the mounting decision itself.
Maintenance and Inspection for Commercial Starlink Mounts
A mount that's installed correctly still needs periodic checks, especially on a commercial roof exposed to more foot traffic, weather, and equipment vibration than a typical home. A twice-yearly inspection of the mount's fixings, ballast weight, and cable sealing catches most problems before they become service interruptions.
Look for loose bolts, cracked sealant around any penetrating mount, and ballast blocks that have shifted out of position after storms or high wind events. Cable entry points deserve particular attention, since failed sealant is one of the more common causes of water ingress on commercial rooftops. Keeping a simple log of inspection dates and findings also makes it easier to spot patterns, like a mount that keeps loosening in the same spot every few months.

Anyone managing several commercial sites with Starlink connections may find it easier to schedule inspections alongside other network maintenance rather than treating the dish as a separate item.
Why We Often Recommend a Professional Install for Exposed Sites
Wind-exposed locations, complex rooflines, and long cable runs are where a professional install earns its cost. Getting it right the first time avoids rework, and a documented handover gives you a record to point back to if anything shifts later. A professional installer regularly scopes and delivers these installs from survey through testing.
— Dylan
Getting Your Starlink Mount Installed Properly
The full process ideally includes site survey, mount selection based on your roof and terminal model, sealing and cable routing done to a proper standard, and signal testing once everything is in place. 
A typical quote covers the mounting hardware, labor, and any cabling or power work your site needs, with most installs completed in a single visit. If you'd rather have an accredited team handle the survey and the drilling, our Starlink & NBN page is the place to request a quote.
FAQ
What are the Starlink mounting options?
Starlink's official lineup includes wall mounts, pivot mounts for sloped roofs, pipe or pole adapters, ridgeline or non-penetrating ballast mounts, roof rack or mobility mounts, and ground or X-frame mounts. Compatibility varies by terminal model, so it's worth confirming fit against Starlink's accessory guide before buying.
How can I mount Starlink to a metal roof without drilling?
A non-penetrating ridgeline or ballast mount is the usual fix, since it uses weight instead of screws to stay in place on metal roofing. These mounts work well on flat or gently sloped metal roofs but add point load, so a wider footprint helps when a taller mast is needed for clearance.
Where is the best place to mount Starlink?
The best spot is whichever candidate location gives the clearest sky view when checked with the Starlink app's obstruction tool. Most installers compare two or three locations before choosing, balancing sky clearance against practical cable routing to power.
Can Starlink signal go through walls?
Starlink's dish needs a direct, unobstructed view of the sky to maintain its connection, and solid walls or roofing will block that signal entirely. This is why every official mount option, from wall brackets to ground frames, is designed to place the dish outdoors with a clear line to the sky rather than behind any structure.