
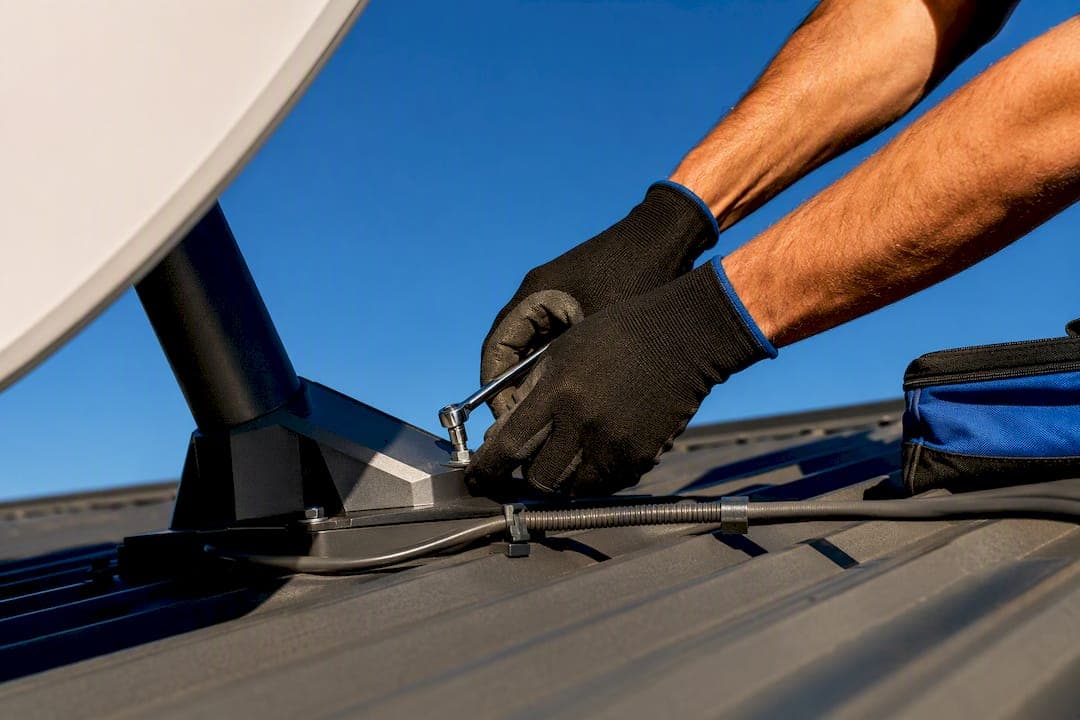
Budget for a moderate range covering hardware and a basic professional Starlink setup in Australia; exact costs vary with options selected. A mounted roof job with cable runs increases labor costs considerably compared to DIY ground installs, which are less expensive. The wildcard is the address-based demand surcharge, which can add anywhere from AU$145 to $1,295 at checkout and needs checking before you commit to anything.
TL;DR:
- Demand surcharges in Australia can range from AU$145 to AU$1,295 and depend heavily on your specific address and local satellite capacity.
- Labor costs for professional installation start at around AU$480 for simple jobs and can exceed AU$1,500 for complex or high-site jobs in coastal or cyclone-prone areas.
- Mount type and cable routing significantly impact total costs, with complex roof or long-distance cable runs raising expenses due to additional hardware and installation time.
- Using UV-resistant conduit, marine-grade fittings, and cyclone-rated hardware upfront can prevent costly retrofits in coastal or cyclone regions.
- DIY ground installs are quick and cheap for unobstructed yards but are not suitable for two-storey or complicated rooftop setups, where professional installation offers safety and reliability benefits.
Table of Contents
- What Does Starlink Installation Cost in Australia?
- What Makes One Starlink Quote Higher Than Another?
- Is Starlink Installer vs. DIY the Right Call for You?
- How to Get an Itemized Starlink Installation Quote
- What Do Professional Installers Actually Do Onsite in Australia?
- What I'd Prioritize If I Were Budgeting for This
- Get an Itemized Starlink Quote from Djcengineering
- Where to Verify Current Starlink Prices and Surcharges
- Sources
- FAQ
What Does Starlink Installation Cost in Australia?
The total bill breaks into four pieces: hardware, an optional demand surcharge, mounting gear, and labor. Each one moves independently, which is why two quotes for the "same" job can look nothing alike.
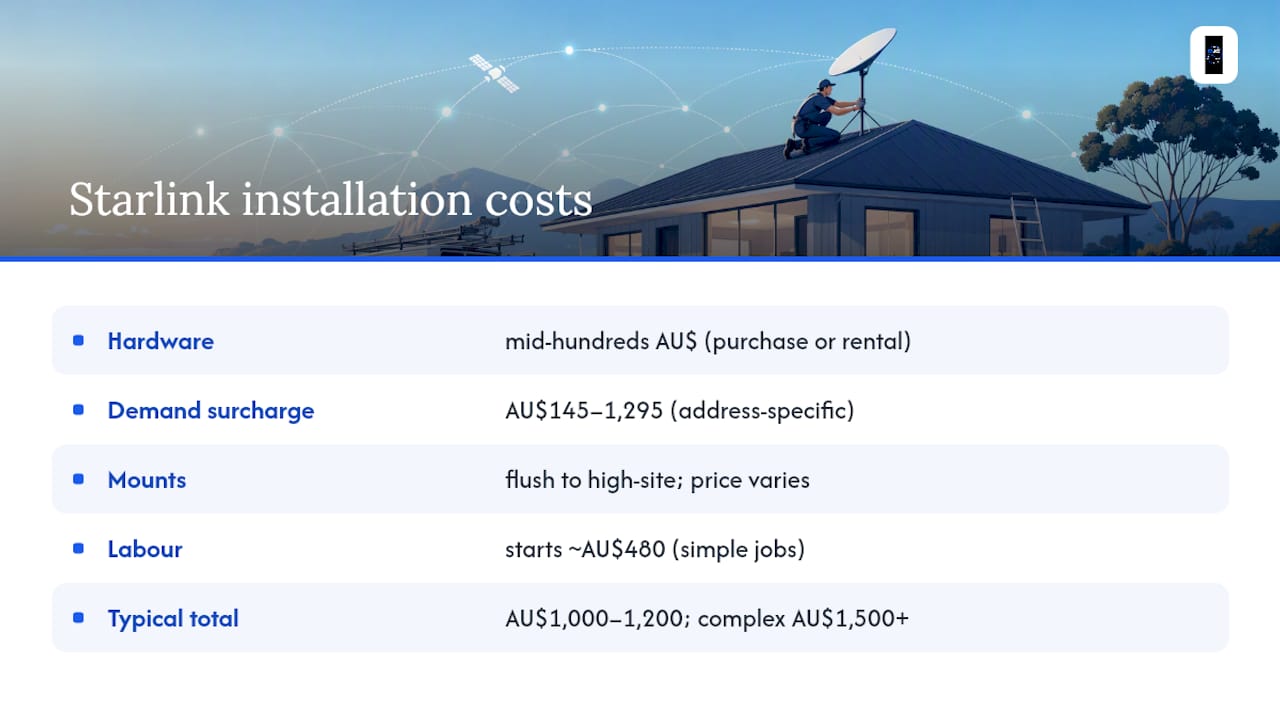
Hardware. The Starlink Standard kit (Gen 3) sells for an amount in the mid-hundreds of Australian dollars, and Starlink also offers a rental option to avoid upfront purchase. Prices shift periodically, so treat that figure as a starting point and confirm it at checkout.
Demand surcharge. Some Australian addresses trigger a one-time demand surcharge at activation, reported at roughly AU$145 to $1,295 depending on how saturated the local satellite capacity is. It only shows up once you enter your specific address at checkout, which is exactly why a "typical cost" guide can only get you so far. The good news: surcharges have been trending down for many addresses as Starlink adds capacity, so it's worth rechecking even if you looked a year ago and got quoted a high number.
Mounts. A basic flush or eave mount runs cheapest. Pole mounts and wind-rated mounts cost more in parts and labor, and a high-site mount designed to clear trees or a neighboring roofline sits at the top of the range.
Cabling and consumables. Conduit, cable clips, extra cable length beyond the standard run, and wall-penetration kits add incremental cost, usually itemized as materials rather than folded into labor.
Labor. Professional installation in Australia typically starts around AU$480 for a simple single-storey job with an easy roof and short cable run. Complex installs, two-storey roofs, tricky access, or cyclone-rated hardware add several hundred Australian dollars or more on top of hardware costs. As a reseller comparison point, Telstra lists a one-off charge of several hundred Australian dollars for its Satellite Tech Pro Home installation, which includes a wind-rated mount and concealed cabling.
Add it up and a simple job lands around AU$1,000 to $1,200 all in; a complex roof job with cyclone hardware can clear AU$1,500.
What Makes One Starlink Quote Higher Than Another?
Roof type is the biggest swing factor. Tile roofs need more careful footing and specific mounting hardware than color bond steel, and anything above single storey adds harness time and risk loading that installers price into the job. A ground mount sidesteps all of that, which is one reason DIY installs stay cheap.
Cable runs matter almost as much. Every extra meter of cable and every wall penetration adds material and labor. A router sitting on the far side of the house from the best sky view means running cable through a wall, sometimes through brick or double-storey cavities, and that's where quotes diverge fast.
High-site mounts, used to clear trees, adjoining roofs, or awkward sightlines, cost more in both hardware and the extra time needed to work at height safely.
Australian conditions add their own line items:
- UV exposure degrades unprotected cable and clips over a few years, so UV-resistant conduit costs more upfront but avoids a redo.
- Salt air corrodes standard fittings within a couple of seasons in coastal zones, which is why marine-grade stainless hardware carries a premium.
- Cyclone-prone regions need engineered, cyclone-rated fastenings, which adds both parts cost and installer time to get right.
- Travel distance for rural or regional jobs adds a callout fee or hourly travel charge that metro installs don't carry.
Pro Tip: If you're on acreage or in a cyclone-classified region, ask the installer to quote the coastal or cyclone-rated hardware option upfront rather than the standard kit. Retrofitting stainless fixings after a standard install fails is more expensive than specifying it correctly the first time.
Is Starlink Installer vs. DIY the Right Call for You?
A basic ground-mounted DIY setup is genuinely easy: unfold the tripod, run a short cable indoors, and let the app find clear sky. Most people managing an unobstructed yard or paddock can be online in under an hour for the cost of the kit alone.
Professional installation earns its keep in specific situations:
- Permanent roof mounts where you want the dish flush and out of the way long-term rather than sitting on a tripod in the yard.
- Two-storey roofs or difficult access, where working at height without the right harness and footing is a genuine safety risk, not just an inconvenience.
- Complex cable routing, especially runs through brick, multiple rooms, or ceiling cavities.
- Farms or multi-building properties needing longer runs or a dish positioned away from the router.
- Coastal or cyclone-prone locations, where mount engineering and corrosion-resistant hardware matter for anything you plan to leave in place through storm season.
Starlink's own cable routing documentation is blunt about this: it warns against attempting risky installation work without the right skills and flags mounting orientation and waterproofing as places DIY installs commonly go wrong. Once you're looking at a roof job over one storey or a coastal fixing schedule, the AU$400 to $600 professional labor charge is cheap compared to redoing a failed mount later.
How to Get an Itemized Starlink Installation Quote
A good installer quote reads like a line-item invoice, not a round number. Ask for it in writing, broken down before you book:
- Labor hours and the hourly or flat rate applied
- Mount type and its individual cost
- Conduit, cable length, and wall-penetration method and cost
- Travel charge, if applicable to your location
- What testing and commissioning is included
- Warranty terms on both labor and hardware
Ask for proof of accreditation or registered cabler status, plus a recent photo of a comparable job. Confirm the installer's testing and commissioning covers a post-install speed test, app configuration, and proper grounding, not just "it's connected." Reputable installer practice includes a site survey before quoting and a written itemized invoice on completion, which protects you if something needs warranty attention later.
Pro Tip: If a quote seems suspiciously low, ask specifically whether it includes the demand surcharge check for your address. Some quotes exclude it deliberately, and it can double your total at activation.
What Do Professional Installers Actually Do Onsite in Australia?
That single habit avoids the most common cause of a second callout: turning up with the wrong mount or not enough cable.
Standard practice for Australian conditions includes:
- UV-resistant conduit on any exposed external run, since standard conduit degrades faster under direct sun than most people expect.
- Marine-grade stainless fittings on coastal properties, where standard fixings corrode within a season or two of salt exposure.
- Cyclone-rated mount hardware in classified regions, engineered rather than improvised.
- Concealed cabling and a documented handover, including a post-install speed test and commissioning record, so you know exactly what was installed and where.
What I'd Prioritize If I Were Budgeting for This
Chase the itemized quote and the post-install speed test before you chase the lowest number. A cheap install that skips testing or grounding can cost more later in service calls than the AU$100 or so you saved upfront. If your property sits near the coast or in a cyclone zone, spend the extra on proper hardware the first time. Retrofitting stainless fixings after a standard mount corrodes is a second job, not a warranty fix. And check starlink.com/au for your address's demand surcharge before you accept any quote, since it can swing your total by over a thousand dollars.
— Dylan
Get an Itemized Starlink Quote from Djcengineering
Djcengineering is the alternative to guessing at install costs for South East Queensland properties: an accredited, site-surveyed quote with the mount, cabling, and labor broken out before anyone touches your roof. Standard Starlink installs include engineered mounts suited to Queensland roofs and coastal exposure, concealed cabling instead of a dish trailing wire across your fascia, mesh WiFi handover if you need whole-property coverage, and documented post-install commissioning with a speed test.
No subcontractors, a single team scopes and installs the job. If you're ready to compare a real number against the ranges in this guide, request an itemized quote through the Djcengineering networking page with your roof type, rough cable run, and address on hand, and you'll get a scoped estimate instead of a guess. For business sites specifically, the Starlink for business overview covers plan tiers worth checking first.
Where to Verify Current Starlink Prices and Surcharges
- Check Starlink's residential Australia page for current hardware and plan pricing plus your address's surcharge.
- Compare Telstra's Starlink page as a reseller-installed alternative.
- See Djcengineering's step-by-step installation guide for procedural detail on complex jobs.
Sources
- Starlink
- Starlink Australia Installation - Budget Seniors
- How Much Does Starlink Installation Cost? — The Ardor
- Telstra Satellite Internet, powered by Starlink
FAQ
What Are the Main Downsides of Starlink?
Weather sensitivity during heavy rain or storms can briefly degrade signal, the dish needs a genuinely clear view of the sky, and upfront hardware and installation costs are higher than a typical NBN modem setup.
How Much Do Installers Charge to Install Starlink in Australia?
Professional installation typically starts around AU$480 for a simple job and rises to AU$400 to $600 or more on top of hardware for complex roofs, coastal hardware, or long cable runs.
Is Starlink Cheaper Than NBN?
Starlink's hardware and installation costs more upfront than an NBN connection, but in areas with poor or no NBN infrastructure, Starlink often becomes the only realistic high-speed option regardless of price; see this Starlink vs NBN comparison for a fuller breakdown.
What Is the Cheapest Way to Get Starlink in Australia?
Buy the standard kit and self-install a ground mount in an open yard with a clear cable run indoors, which avoids both the mounting hardware cost and professional labor charges, provided your address doesn't carry a high demand surcharge.