
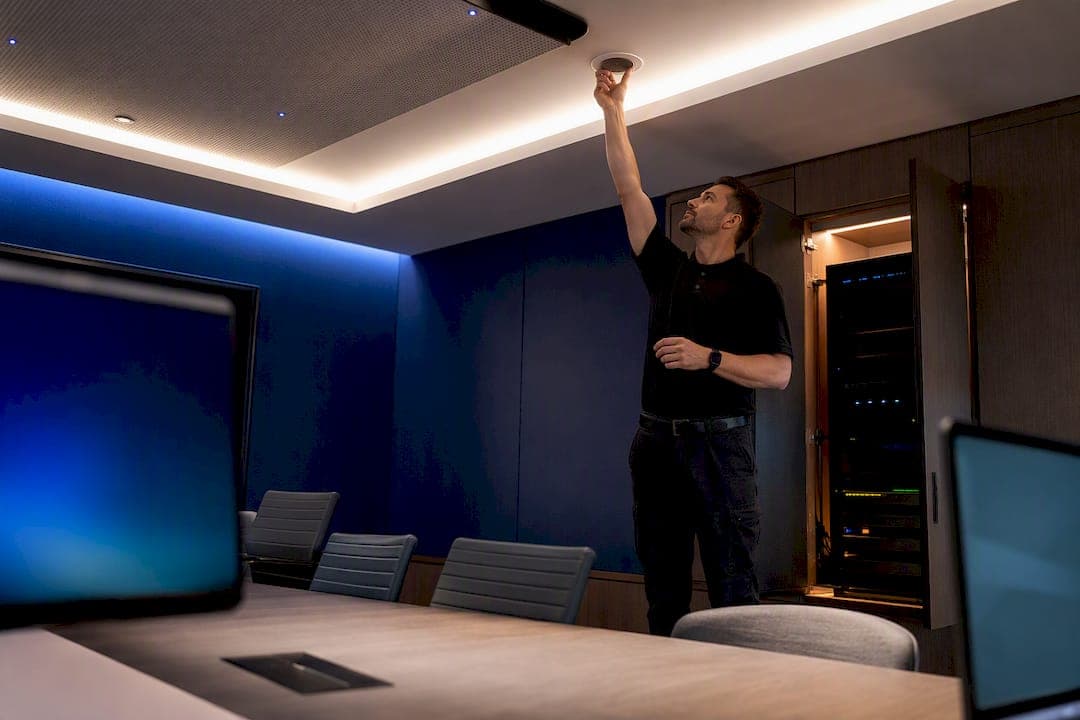
A dependable video conferencing setup comes down to four things: clear, consistent audio; natural, well-framed video; a meeting join that takes seconds, not minutes, and a network connection that doesn't buckle under load. Get those right for your specific room, and everything else, screen size, camera resolution, brand of gear, is just detail. The rest of this guide walks through exactly how to hit that bar, room by room.
TL;DR:
- Small rooms benefit from all-in-one video bars that cover up to six participants, simplifying installation and reducing failure points.
- Medium and large rooms require modular systems with specialized cameras and microphones to ensure full coverage and optimal sound quality.
- Proper camera placement at eye level and use of diffused lighting greatly improve video quality and natural eye contact for remote participants.
- Dedicated audio hardware with ceiling or tabletop microphone arrays prevents echo and background noise, critical for clear communication in larger spaces.
- Complex setups with concealed cabling and ceiling microphone arrays should be handled by professional installers to ensure reliability and avoid costly rework.
Table of Contents
- What Room Type Determines Your Video Conferencing Setup?
- What Hardware Do You Need for Each Room Size?
- Should You Choose Teams Rooms, Zoom Rooms, or BYOD?
- How Should You Position Cameras, Lighting, and Displays?
- What Makes Audio Setup the Most Important Part?
- What Network and Cabling Setup Prevents Dropped Calls?
- How Do You Test and Calibrate a New Conference Room?
- When Should You Bring in a Professional Installer?
- Practical trade-offs we see on installs
- Get Your Meeting Rooms Installed Right the First Time
- Sources
What Room Type Determines Your Video Conferencing Setup?
Before buying anything, classify the room. Equipment that works beautifully in a 4 person huddle space will fail badly in a 20 seat boardroom, and vice versa.
- Huddle room (2 to 4 people): tight space, one camera angle, minimal audio distance, usually built for quick check ins rather than formal presentations.
- Small room (4 to 6 people): a single table, one screen, still simple enough for an all in one device.
- Medium room (7 to 12 people): longer table, wider seating, audio pickup becomes the deciding factor.
- Large room (12+ people, boardrooms and training spaces): needs dedicated cameras, distributed microphones, and often dual displays.
Purpose matters as much as headcount. A training room prioritizes screen visibility and presenter audio over camera framing. A collaboration space prioritizes microphone coverage across a full table. Before you spec anything, note your target field of view, your mic pickup radius, and how far the back row sits from the display, because that last number decides your screen size more than anything else.
What Hardware Do You Need for Each Room Size?
The hardware stack breaks into five categories: camera, microphone, speaker, display, and compute. How you combine them depends entirely on room size.
- Huddle and small rooms: an all in one video bar (camera, mic, and speaker in one unit) is almost always the right call. It's a single cable to run, a single device to manage, and it covers a 4 to 6 person table without extra parts. The Logitech room design guide recommends exactly this approach for small to medium spaces, and many organizations lean toward bars here simply because there are fewer connection points to fail.
- Medium rooms: this is where a modular setup starts to pay off. A dedicated pan tilt zoom (PTZ) camera paired with a tabletop or ceiling microphone pod handles the wider seating that a bar's fixed lens can't frame well.
- Large rooms and boardrooms: go fully modular. That means a PTZ or multi camera system, a ceiling microphone array for full table coverage, dedicated speakers positioned for even sound distribution, and often two displays, one for the video feed, one for shared content.
On compute, you have three real options: bring your own device (BYOD) over a single USB-C cable, a dedicated appliance running Windows or Android that hosts the room software directly, or compute built into the video bar itself. BYOD is simplest for occasional-use rooms; dedicated appliances give IT teams centralized management and remote monitoring, which matters once you're running more than a handful of rooms.
Should You Choose Teams Rooms, Zoom Rooms, or BYOD?
Pick your room software based on what your organization already runs, not what looks newest.
- Microsoft 365 organizations generally do better with Teams Rooms, since licensing, calendar integration, and device management already sit inside the ecosystem they use daily.
- Zoom-first organizations typically prefer Zoom Rooms for the same reason: the certified hardware and admin tooling match the platform their staff already know.
- BYOD (a simple USB-C connection from a laptop to the room's camera and mic) works fine for smaller, occasional-use spaces where you don't want the overhead of licensing a dedicated room system.
- Dedicated compute becomes worth the cost once a room hosts multiple meetings a day, or when you need consistent one-touch join without someone plugging in a laptop first.
Mixing platforms across a building usually creates more support tickets than it saves in flexibility. Standardize where you can.
How Should You Position Cameras, Lighting, and Displays?
Camera height is the single most fixable mistake in most rooms. Mount the camera at roughly eye level, approximately at a comfortable seated height for most users, and center it directly above or below the display so eye contact reads naturally on the far end. The Stanford UIT best practices guide backs this as a baseline for any room, large or small.
- Check sightlines from every seat, not just the one closest to the camera.
- Use front-facing, diffused light rather than harsh overhead spots that cast shadows across faces.
- Position desks away from direct window glare, or add blinds if the room faces east or west.
- Clear visible clutter from the background, or install a simple branded backdrop panel behind the presenter seat.
Pro Tip: A cheap $30 LED panel angled at 45 degrees toward the presenter's face fixes more video complaints than any camera upgrade you could buy.
What Makes Audio Setup the Most Important Part?
Meeting participants forgive soft video far more readily than they forgive audio that cuts out or echoes, which is exactly why audio deserves more design attention than most rooms get. Built-in laptop microphones simply can't compete with dedicated hardware once more than two people are in the room.
- Huddle and small rooms: a single bar-integrated mic array usually covers the whole table.
- Medium rooms: add a tabletop mic pod or extend coverage with a second beamforming mic to reach the far end of the table.
- Large rooms: install a ceiling microphone array, and plan for pickup radius overlap of roughly 3 to 6 meters per seat cluster, so no seat falls into a dead zone, a structured placement approach that measurably cuts down on mid meeting manual adjustments.
Speaker placement matters just as much as mic choice. Keep speakers away from microphones to avoid feedback loops, and rely on the system's built in echo cancellation rather than manually boosting volume, which is usually what causes the squeal in the first place. The Stanford UIT guidance is blunt on this point: ceiling or table mounted mic arrays outperform laptop mics specifically because of how much better they handle echo and background noise.
What Network and Cabling Setup Prevents Dropped Calls?
Video quality collapses long before most people notice their bandwidth is the problem. A reasonable baseline is roughly 10 Mbps symmetrical per active conference room for HD calls, with extra headroom if multiple rooms run simultaneously on the same connection.
- Put conferencing traffic on its own VLAN, and apply quality of service (QoS) rules so video and audio packets get priority over general office traffic.
- Run structured, plenum-rated cabling through concealed raceways wherever cable is visible or exposed to ceiling airflow.
- Use active USB-C extenders for any camera or mic run longer than about 5 meters, since passive USB cables run too long is one of the most common post-install faults technicians find.
- Put room controllers and network switches on a small UPS so a brief power blip doesn't kill a meeting mid-call.
- Label every cable run and port at both ends. It sounds trivial until someone's troubleshooting a dead mic at 8:45 AM before a client call.
How Do You Test and Calibrate a New Conference Room?
Never treat installation as finished the moment the last cable is plugged in. Run through a full checklist before handing the room back to staff, a sequence the Sennheiser step-by-step guide frames as assess, install, then test and calibrate, in that order.
- Run a full local test: check audio levels, camera framing, and content sharing from a laptop physically in the room.
- Run a remote test: have someone outside the building join the same meeting to confirm what the far end actually sees and hears.
- Test calendar-based one-touch join and a guest join link separately, since guest access often breaks in ways internal testing misses.
- Calibrate mic gain, set camera presets for common seating positions, and save a couple of PTZ presets so no one fiddles with framing mid-meeting.
- Record a two-minute test call, play it back, and fix anything that sounds off before the first real meeting happens.
Once the room passes, post a one-page quick-start card near the display and put a 90-day health check on the calendar.
When Should You Bring in a Professional Installer?
Some rooms are simple enough to set up yourself in an afternoon. Others aren't, and pretending otherwise usually costs more in rework than it would have cost to hire it out the first time.
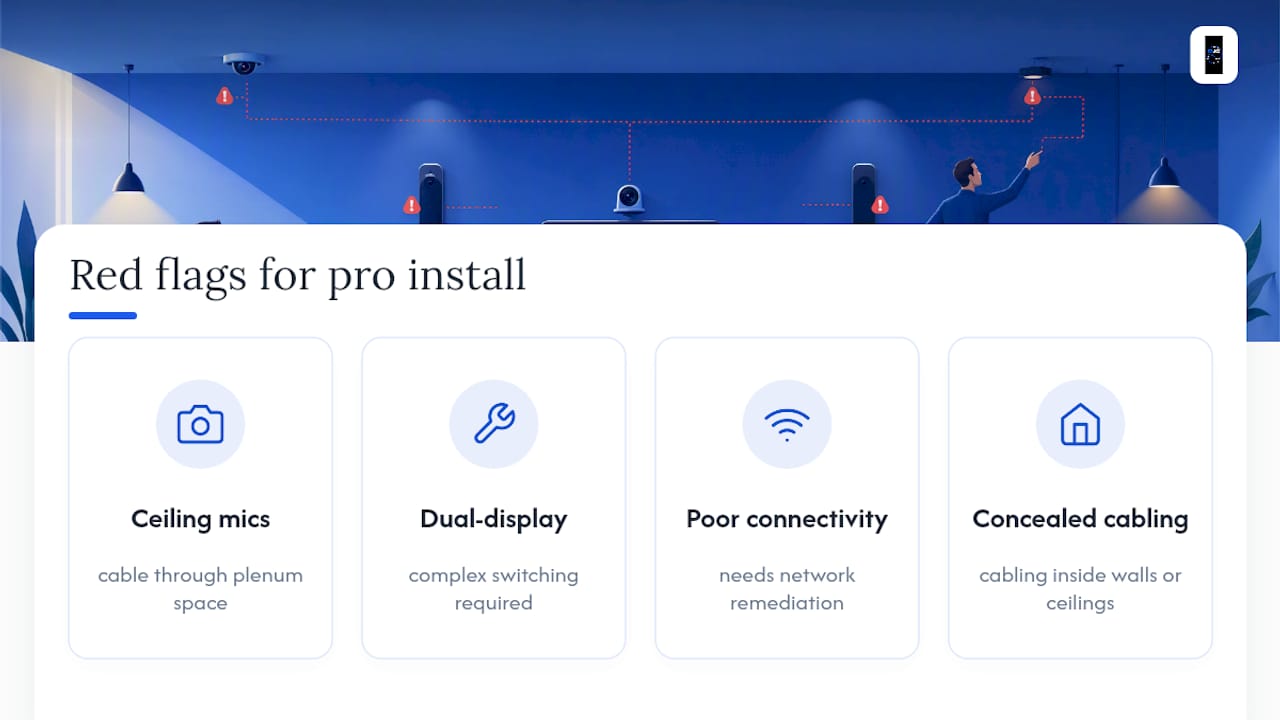
Red flags that mean you need a scoped, professional installation: ceiling microphone arrays that require running cable through a plenum space, dual-display boardrooms with complex switching, poor site connectivity that needs its own network remediation, or any room where cabling has to be concealed inside walls or ceilings.
Djcengineering builds these rooms with a documented engineering approach that includes a proper site survey, wiring diagrams handed over at completion, and integrated cabling run through comms racks rather than left loose behind furniture. That process backs a 98% first-visit fix rate on installs, meaning the room works correctly the first time a technician leaves the site, not after three follow-up visits.
Practical trade-offs we see on installs
Cheap cable now almost always costs more later; pay for plenum-rated runs and active extenders up front. All-in-one bars win on simplicity for small rooms, but modular systems scale better once a room grows past eight or ten seats. When budgets force a choice, spend on mic coverage before display size. Nobody complains about screen resolution nearly as often as they complain about not being heard.
— Dylan
Get Your Meeting Rooms Installed Right the First Time
Reading through room sizing, mic coverage, and network specs is one thing. Running plenum-rated cable through a ceiling cavity or wiring a distributed mic array without a site survey is another.
If your room needs concealed cabling, a comms rack, or a network that won't choke during an all hands call, Djcengineering's networking team can scope the job, hand you a wiring diagram, and test the room before your first real meeting runs through it. Get in touch to book a site assessment.
Sources
- Stanford UIT — Video Conferencing best practices
- Logitech room design guide
- Teams Rooms vs. Zoom Rooms: What's the difference? | TechTarget
- Sennheiser — A step-by-step guide to setting up video conferencing