
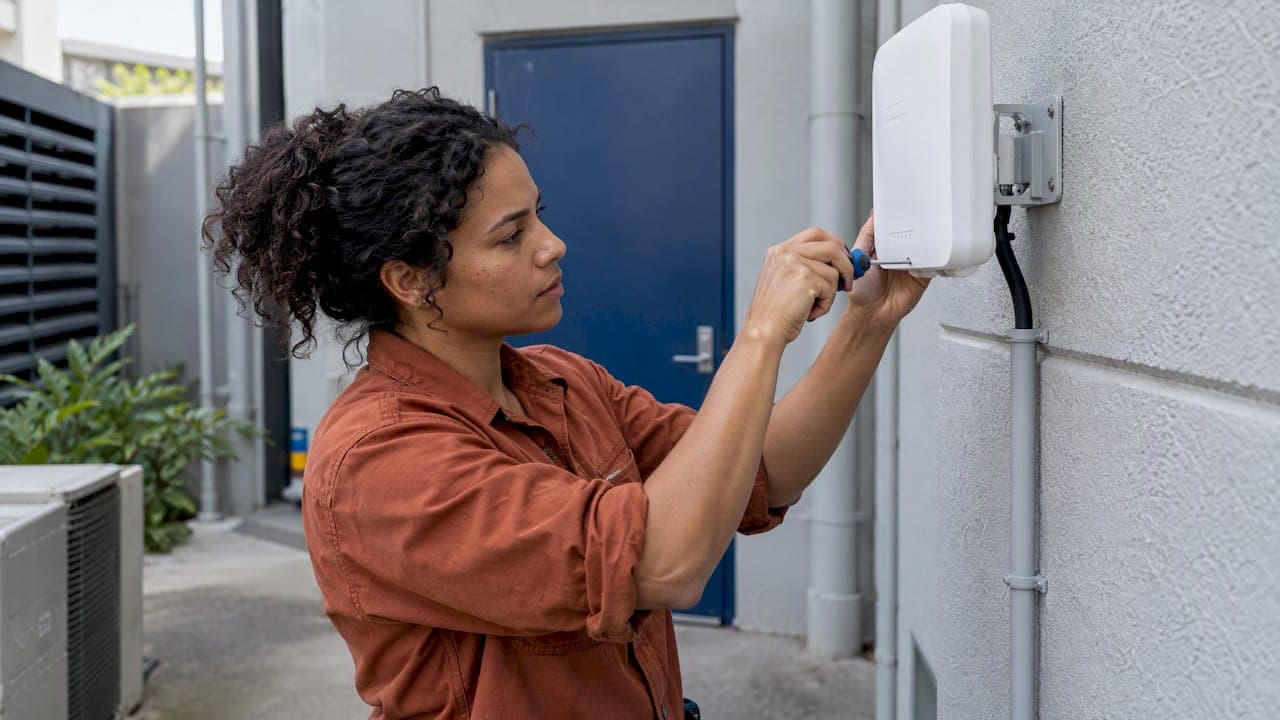
A reliable outdoor WiFi installation comes down to four things: a walk-through of the property to decide where signal is actually needed, a wired (PoE) connection to each outdoor access point, outdoor-rated and properly grounded gear, and a test once it is switched on. Skip any one and you get the familiar result: strong signal at the back door and nothing at the pool, shed or front gate. In Australia, much of the cabling side is also regulated, so the job is not purely a weekend DIY project.
This guide walks through how we approach it on homes, businesses and rural properties in South East Queensland, and what you should expect from anyone who quotes the work.
TL;DR
- Survey first. Mark where people and devices really use the network (patio, pool, sheds, gates, cameras) instead of trying to blanket the whole block.
- Run Ethernet to every outdoor access point and power it with PoE. A wired link beats any wireless relay for speed and stability.
- Use outdoor-rated cable and gear, ground it, and keep it out of spots where water collects.
- Cabling connected to a telecommunications network generally has to be done by, or under the supervision of, a registered cabler. Only simple, low-risk tasks are open to householders.
- Test at the edges of the coverage area, with a phone and a laptop, before you call the job finished.
Table of Contents
- Start with a walk of the property, not a shopping list
- Wired or wireless: choosing the right outdoor connection
- How an outdoor access point is installed with PoE
- Weatherproofing, grounding and surge protection
- Where to mount the access point
- Who can do the cabling work in Australia?
- Perspective: why we cable first and survey every site
- Configuring and testing outdoor WiFi
- Get it designed and installed properly
- FAQ
- Sources
Start with a walk of the property, not a shopping list
The most common mistake in outdoor WiFi is buying a high-powered unit first and asking where it goes later. Range claims on a box assume open air and no obstacles. Real properties have brick walls, colorbond sheds, trees, pool equipment and slopes, and every one of them changes what a signal does.
That is why we start with a site survey. Walk the property with whoever will use it and write down:
- Where people sit or work outdoors: deck, alfresco, pool area, garden office, granny flat.
- Where devices live outdoors: cameras, gate controllers, intercoms, outdoor speakers, irrigation controllers.
- Where power and cable can realistically go: existing conduit, switchboard locations, eaves, roof spaces.
- What is in the way: masonry, metal cladding, dense foliage, distance between buildings.
Then rank the spots. Buildings come first, then pools, gates and finally general yard space. Covering a gate that is a couple of hundred metres from the house is a different kind of job from covering a patio, and treating them the same wastes money. If you want a deeper look at planning a perimeter, see our guide to perimeter WiFi coverage, and our piece on why IP65-rated gear still needs a survey.
Why range numbers are unreliable
You will see figures such as "covers 100 m" on outdoor products. Treat them as best-case lab numbers. One brick wall can cut coverage sharply, a metal shed can block it almost entirely, and wet foliage absorbs more than you would expect. The honest way to predict coverage is to measure on site, which is why a fixed-scope quote should follow a survey rather than precede it.
Wired or wireless: choosing the right outdoor connection
There are three ways to get WiFi outside, and they suit different situations.
| Option | Best for | Trade-off |
|---|---|---|
| Outdoor access point on Ethernet (PoE) | Patios, pools, courtyards, sheds you can cable to | Needs a cable run, but gives the best speed and stability |
| Point-to-point wireless bridge | A separate building or gate with no practical cable route but a clear line of sight | Needs a clear line of sight at both ends and careful alignment |
| Mesh node or range extender, wireless backhaul | A small gap in coverage just outside the house | Shares airtime between the link and your devices, so speed drops with each hop |
The principle is simple. If Ethernet can reach the location, a wired access point performs better because it avoids the bandwidth penalty of relaying signals wirelessly, and wireless mesh backhaul makes nodes share bandwidth with the devices connected to them. That is why we cable wherever we can and keep wireless links for the places cable cannot economically go. We cover the same trade-off indoors in mesh backhaul options.
A gate, shed or paddock structure far from the house with no line of sight is usually better served by a bridge planned as its own small project than by a standard outdoor access point pushed to its limit. Bridges need a clear line of sight between the two ends, and trees that look harmless in winter can grow into the path. For larger blocks, read our notes on acreage WiFi coverage.
How an outdoor access point is installed with PoE
Power over Ethernet (PoE) sends both data and power down one network cable, so the access point does not need a power outlet at the mounting spot. That matters outdoors, where a power point under an eave or on a pole is often the hardest thing to arrange.
The basic chain looks like this:
- The router or gateway connects to a PoE switch, or to a PoE injector.
- A single outdoor-rated Ethernet cable runs from that switch or injector to the access point.
- The access point is mounted, aligned and sealed against the weather.
- It is adopted or configured in the network controller or its web interface, with the right SSID, security and channel settings.
Manufacturer guidance describes the same arrangement: connect the outdoor access point by Ethernet to a PoE injector, then connect the injector to the gateway, and use outdoor wireless units as bridges for remote sites.
Cable length and cable choice
Ethernet has a length limit, and outdoors heat makes it tighter. A public specification from the NSW Department of Education recommends limiting permanent link lengths to 75 metres to allow for temperatures above 20 degrees Celsius and for PoE heat rise. Queensland summers are exactly where that matters. If a location is further than that, the answer is usually a switch partway along the route or fibre, not a longer copper run.
Which category of cable should you run? For most outdoor access points, Cat6 is adequate and Cat6A is worth considering when you are cabling for the long term. We compare them in Cat6 vs Cat6A.
Just as important is the jacket. A cable sold as "waterproof" is not automatically sunlight-proof. Standard indoor cable becomes brittle in UV and fails within a few seasons, taking your WiFi with it. We explain what to look for in why you should not trust waterproof claims without a UV rating.
Weatherproofing, grounding and surge protection
Outdoor access points live in a harsh environment, and a little care at installation prevents most failures.
- Use outdoor-rated cable where it leaves the building. The NSW Department of Education specification calls for outdoor-rated, gel-filled cable for runs exiting buildings, along with waterproof outlet covers, UV- and water-protected patch cable to the external access point, and grounding and bonding to the relevant standards.
- Add surge protection. The same document requires surge protection at the distributor end for underground external cabling. Lightning-prone areas of South East Queensland make this a sensible habit for any cable run that leaves the building, not just a school requirement.
- Ground the access point. Manufacturer instructions say outdoor access points need a safety grounding system to protect against lightning and static electricity, and that it must meet applicable local safety standards.
- Avoid spots where water collects. Another vendor installation guide advises against mounting where there is water accumulation, seepage or condensation, and suggests sealing measures if that cannot be avoided. Drip loops in the cable and sealed connectors are cheap insurance.
- Keep noisy equipment away. Pool pumps, variable-speed drives and heaters generate electrical noise, so keep access points and their cabling a reasonable distance from them.
Grounding and mains-side work is a job for a licensed electrician where mains power is involved. A PoE access point on low-voltage cabling avoids needing a power outlet at the mounting position, which is another reason we favour it.
Where to mount the access point
Mounting position decides more than the model you buy.
Height. Higher is not always better. Mount the unit high enough to clear people, vehicles and garden clutter, but remember that a unit mounted far too high can throw its signal over the area you actually want covered. Under an eave looking down onto a patio often beats the ridge of the roof.
Direction. Many outdoor units are directional or sector-style. Point them at the area to be served, not at the sky or the neighbour's yard.
Walls. An access point mounted on the outside of a brick wall covers the yard well but can leave the room behind that wall weak, and vice versa. Decide which side matters most, or use both an indoor and an outdoor unit.
Metal. Metal sheds, roofing and cladding block or reflect signal. A shed with a steel skin usually needs its own access point, fed by cable, rather than a signal pushed through the wall.
Pole mounts. Where there is no building nearby, a pole mount with a cable run in conduit is common, particularly for gates and driveways.

Who can do the cabling work in Australia?
This is the part most outdoor WiFi guides, written overseas, skip entirely.
In Australia the Australian Communications and Media Authority (ACMA) regulates cabling work to manage two risks: electrical safety for users and workers, and the integrity of the network. Under the current declaration, householders may do simple, low-risk tasks connecting certain customer-cabling products or equipment, as long as no connected cabling is concealed in a building cavity. Other cabling work connected to a telecommunications network must be carried out by, or under the supervision of, a registered cabler, unless the declaration's schedule exempts it.
In practice, plugging in an access point to an existing outlet is one thing. Pulling new cable through roof spaces, walls or conduit to the back of the yard is another, and that is registered cabler territory. If you are weighing it up, our overview of ACMA cabling rules for on-site cablers explains what a compliant job looks like, and network cabling costs in Australia covers how fixed-scope quotes are usually put together.
Any electrical work, such as a new power point or earthing, also needs a licensed electrician. Ask whoever quotes your job to show their registration and licence details before work starts.

Perspective: why we cable first and survey every site
We design, scope, install and configure each job with our own licensed, accredited team, without subcontractors. For outdoor WiFi that matters more than it sounds. The cable run, the mounting, the network configuration and the test all affect each other, and when one crew does the lot, there is nobody to point the finger at if a corner of the yard is weak.
Our approach is built around three habits. We survey the property before quoting, because range can only be judged on site. We prefer a wired access point over a wireless relay wherever a cable can reasonably go, because it gives you a faster, steadier network. And we fix a scope before we start, so you know what is covered before the first cable is pulled. We report a 98% first-visit fix rate across our work, and we put that down to this scope-first way of working.
The outdoor jobs we are asked about most often are alfresco and pool coverage, sheds and granny flats, camera and gate connections, and rural blocks where Starlink or NBN lands at one building and the rest of the property needs to be reached. Each one starts with the same walk-through. If you take one thing from this guide, make it that: decide what you need to cover, then choose the equipment.
— Dylan
Configuring and testing outdoor WiFi
Once the hardware is mounted, the setup is where good installs separate from average ones.
- Use one network name across indoor and outdoor units where they are part of the same system, so devices roam between them without you thinking about it.
- Set security properly. Use WPA2 or WPA3 and a strong passphrase. Put cameras, gate controllers and guest devices on their own network segment where your equipment allows.
- Pick channels deliberately. In dense suburbs, neighbours' networks compete with yours. The 5 GHz band gives more room but a shorter reach, while 2.4 GHz travels further but is more crowded. Many outdoor jobs run both.
- Set transmit power sensibly. Maximum power is not best. An outdoor unit that is too loud can reach devices that cannot reach back, which causes dropouts.
- Test at the edges. Walk the boundary of the intended coverage area with a phone and a laptop, run a speed test at several points, and watch for the moment performance falls off. Do it at different times of day.
- Test under load. Stream video on one device while you test on another. Signal bars alone do not show whether throughput holds up.
Fixing common problems
- Strong signal, slow speeds: usually a wireless backhaul or interference problem. Moving to a wired link or changing channel often fixes it.
- Drops at one particular spot: look for a metal object, a thick wall or a pool equipment pad in the path, and consider a second access point instead of more power.
- Works for weeks, then fails after rain: suspect water in a connector, a cable jacket that is not UV-rated, or a missing drip loop.
- Device keeps clinging to the weak signal: devices sometimes stay joined to a distant unit. Lowering transmit power or adjusting roaming settings can help.
- Internet slow everywhere, not just outside: the issue may be the connection itself, not the WiFi. A faster router will not help if the NBN or Starlink service is the bottleneck.
Newer standards do not change the physics. Our note on Wi-Fi 7 mesh explains why headline speeds will not fix poor coverage, and the same is true outdoors. For larger homes, site-surveyed mesh follows the same logic.
Get it designed and installed properly
If you would rather have the survey, cabling, access points and testing handled by one accredited team, that is what we do across South East Queensland. Our IT and networking service covers data cabling, Wi-Fi and mesh systems, wireless access points, PoE network installation, network switches and racks, and Starlink installation for homes, businesses and rural properties. Pricing is by fixed-scope quote after we understand the site, as we do not publish set prices.

Tell us what you want to cover outdoors and where the internet comes in, and we will scope the job around that.
FAQ
Can I install outdoor WiFi myself in Australia?
You can do simple, low-risk tasks, such as plugging an access point into an existing, properly installed outlet. New cabling connected to a telecommunications network generally has to be done by, or under the supervision of, a registered cabler, and ACMA sets the detail in its cabling work declaration. Anything involving mains power needs a licensed electrician.
Is an outdoor access point better than a WiFi booster or mesh node?
Where you can run Ethernet, yes. A wired access point avoids the speed loss that comes from relaying signal wirelessly. A booster or mesh node with wireless backhaul can be fine for a small gap just outside the house, but expect speed to drop the further it sits from the main router.
How far will one outdoor access point reach?
It depends on walls, metal, foliage, the band used and the mounting position, so any single figure is unreliable. Open yards are served well by a well-placed unit, while sheds and distant buildings often need their own access point or a wireless bridge. A site survey gives you a realistic answer for your property.
Does outdoor WiFi need to be grounded?
Yes. Manufacturer instructions for outdoor access points call for a grounding system to protect against lightning and static electricity, built to local safety standards. Surge protection on cable runs that leave the building is also good practice.
Can I get WiFi to a shed or gate far from the house?
Usually, yes. If cable can reach it, run PoE Ethernet, with a switch partway if the distance is long. If not, a point-to-point wireless bridge with clear line of sight is the standard approach for remote buildings and gates.
Sources
- ACMA: Telecommunications (Types of Cabling Work) Declaration 2024
- NSW Department of Education: Structured Cabling System Specification, Version 1.3
- WiFi Weekly: Access Point vs. Extender vs. Mesh
- TP-Link: Outdoor Solutions Guide
- D-Link: DAP-3662 Quick Installation Guide
- Hardware Installation and Reference Guide, RG-RAP6202