
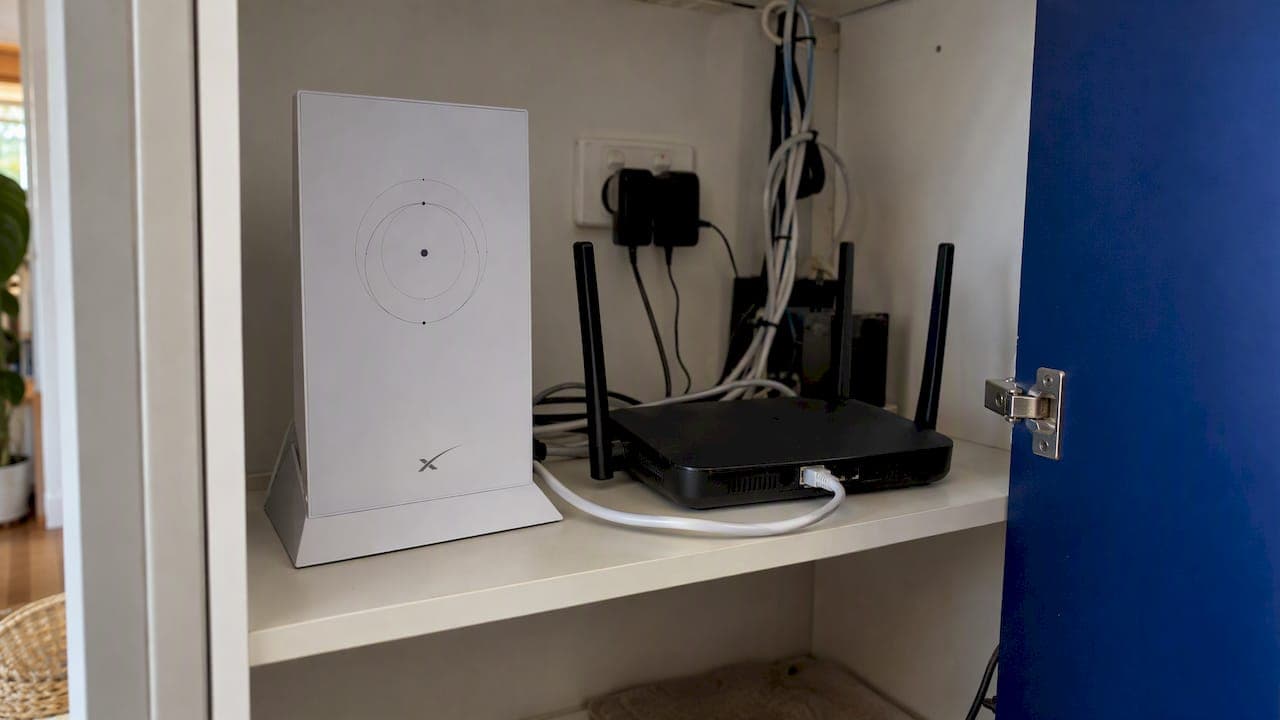
Starlink bypass mode switches off the Wi-Fi and routing functions of the Starlink router, so your own router or mesh system can run the network. The Starlink router stays plugged in and powered, but it only feeds the dish and hands the connection to your gear. You turn it on in the Starlink app, and the only way back is a factory reset.
That is the short version. The longer version matters, because bypass mode is not always the right move. On some setups you get a cleaner network by leaving it off and putting your own equipment in access point mode. Below we cover what changes, how to set it up, what to buy, and how to decide.
TL;DR
- Bypass mode disables the Starlink router's Wi-Fi and routing. Your own router takes over, and the Starlink router just powers the dish.
- Enable it in the Starlink app under Settings. There is no off switch: you exit by factory resetting the router.
- A Gen 2 router has no Ethernet port, so you need the Starlink Ethernet adapter. Newer Gen 3 hardware has built-in ports.
- If you only want better Wi-Fi coverage, you can often skip bypass and run your mesh as access points instead, which avoids double NAT.
- Do not use bypass just to add a network switch. Starlink advises against it.
Table of Contents
- What bypass mode actually does
- When bypass mode is worth it
- When you do not need bypass mode
- What you need before you start
- How to set up Starlink bypass mode
- How to turn bypass mode off
- Starlink mesh Wi-Fi and extending coverage
- Cabling matters more than the mode
- Perspective: how we approach it
- Troubleshooting a bypass setup that will not connect
- Get it set up properly
- FAQ
- Sources
What bypass mode actually does
Out of the box, the Starlink router does three jobs: it creates the Wi-Fi network, it hands out IP addresses, and it does network address translation (NAT), which is how all your devices share one public connection. Bypass mode turns off the router's Wi-Fi features completely so a third-party router can be connected directly.
After you switch it on, your own router handles all routing. The Starlink router functions strictly as a power source for the dish. It is not redundant, though. PCMag Australia notes that it must stay powered on to support the dish, so you need enough power outlets for both devices.
There is one more trade-off worth knowing before you commit: you may lose access to some Starlink app features once a third-party router is in charge. Basic dish status is still useful, but do not expect the app to manage your Wi-Fi any more.
Bypass mode, bridge mode and access point mode
People search for "Starlink bridge mode" and mean the same thing as bypass. Some guides use the two terms interchangeably, and in practice the effect is the same: the Starlink router stops routing and your router does the work. Starlink's own setting is called bypass mode, so that is the name you will see in the app.
Access point mode is a different idea, and it lives on your own router or mesh, not on Starlink. In that setup, the Starlink router keeps routing and your mesh nodes just add Wi-Fi coverage. We come back to this below, because it is often the simpler option.

When bypass mode is worth it
Bypass makes sense when you want your own router to be the brain of the network. Typical reasons we see on South East Queensland properties:
- You already own a capable router or mesh. Third-party routers can give stronger Wi-Fi signals and better tools for managing a mesh than the standard Starlink unit.
- You need advanced features. VLANs for guests or CCTV, firewall rules, port forwarding, or a managed system that a business or large home wants to control centrally.
- You want one NAT, not two. Running a second router behind the Starlink router creates double NAT, which can upset gaming, VoIP, remote access and some camera apps.
- You want a single Wi-Fi network. Two networks broadcasting in the same space is messy. Bypass shuts the Starlink one off.
On a rural block with a shed, a house and perhaps a granny flat, the network often needs a proper design rather than a single box. If the dish sits far from the house, the cable run and the backhaul matter more than the mode. Our guide to Starlink mounting options in Australia covers sky view and placement, and our piece on Starlink for farms covers how that plays out on working properties.
When you do not need bypass mode
You can use your own router with Starlink without bypass. The cleanest example comes from a mesh vendor's own Australian guidance: for a Gen 2 setup, you can leave bypass off and put the mesh in access point mode, or turn bypass on and run the mesh in router mode. With a Gen 1 router, access point mode is the recommended route to avoid double NAT.
In plain terms:
| Goal | Best approach |
|---|---|
| Better Wi-Fi coverage across a large house, nothing fancy | Leave bypass off, mesh in access point mode |
| Full control of routing, VLANs, firewall | Bypass on, your router in router mode |
| Adding a few wired ports | A switch behind the Starlink router, bypass off |
| Replace everything with a managed network | Bypass on, managed router, switches and access points |
That third row is a common trap. Starlink advises against using bypass mode merely to add a network switch, because the mode is meant for third-party routers and provides only one IP address. If you only need more ports, plug a switch into the router and leave bypass alone.
What you need before you start
Check these four things first.
- Which router you have. A Gen 2 router has no Ethernet port. A Gen 3 router has them built in.
- The Ethernet adapter, if needed. To connect a third-party router or mesh to a Gen 2 terminal, you must buy the Starlink Ethernet adapter separately. Newer Gen 3 hardware has built-in RJ-45 ports, so no adapter is needed.
- Your own router. It should support DHCP and NAT, since you lose the Starlink router's DHCP once bypass is on.
- A way to reach the router's settings. Write down your current network name, password and any custom settings before changing anything.
Note that the original circular dish does not offer bypass mode, according to some guides. Check your hardware generation before ordering anything.
How to set up Starlink bypass mode
The order matters. Do it in this sequence and you avoid most of the dropouts people complain about.
Step 1: Fit the Ethernet adapter (Gen 2 only)
Unplug the router, disconnect the Starlink cable from the router, insert the adapter into that port, plug the cable back into the adapter, and restore power. DISHYtech's walkthrough shows the physical steps. Allow a few minutes for the dish to reconnect.
Step 2: Confirm the connection works first
Before enabling bypass, make sure the Starlink network is online with the stock Wi-Fi. If the dish cannot see the sky, no setting will fix it. This single check saves a lot of confusion later.
Step 3: Enable bypass mode in the app
Open the Starlink app, go to Settings, choose bypass mode and switch it on. A violet LED appears and turns off after an hour. Your Starlink Wi-Fi will disappear at this point, so do this on a wired connection or expect to lose your phone's link to the app.
Step 4: Connect your router
Plug your router's WAN port into the Starlink Ethernet port or adapter. Power up the router and let it get an address. Most routers pick it up automatically. Then set up your Wi-Fi network name and password the way you want them.
Step 5: Rebuild the rest of the network
Add mesh nodes, access points and switches. Run your devices on the new network and test properly: speed, video calls, camera feeds, and any remote access you rely on.
How to turn bypass mode off
This is where people get caught. There is no toggle in the app to disable it. Starlink says to factory reset the router, holding the rear reset button until the LED flashes rapidly, then waiting for it to reboot. Another guide describes the methods by model: power-cycle a Gen 2 router six times, or press the reset button on a Gen 3 router.
A reset wipes your Starlink Wi-Fi name and password, so you will set those up again. Because it is a deliberate step, be intentional about enabling bypass in the first place.
Starlink mesh Wi-Fi and extending coverage
A lot of people ask about the best way to extend Starlink Wi-Fi. The honest answer is that it depends on the building and the cabling, not on the Starlink setting.
Option 1: Wired access points. This is the most reliable method. Run Ethernet to each access point so every node has a full-speed link. It beats any wireless extender and suits double-brick homes, sheds and multi-building properties. Our guide to mesh backhaul options explains why a wired backhaul is so much faster than a wireless one.
Option 2: Mesh with wireless backhaul. Fine for smaller homes with clear line of sight between nodes. Each wireless hop costs speed, so keep it to one hop where you can.
Option 3: Starlink's own mesh nodes. Workable for a modest home, with the app managing everything. You lose the deeper controls a third-party system gives you.
Whichever you pick, a faster standard will not rescue a bad layout. Our article on Wi-Fi 7 mesh explains why headline speeds do not fix poor coverage, and the one on Wi-Fi channel interference shows how to scan before you change anything. If the target is a separate dwelling, see Wi-Fi for a granny flat.

Cabling matters more than the mode
Bypass mode puts more weight on your own equipment, and that equipment is only as good as the cable behind it. For runs inside a building, the choice between categories is worth a look: this breakdown of Cat6 versus Cat6a cable explains what to specify for a new fit-out.
Outdoors it is a different story. Sun, heat and UV break down cheap cable jackets fast, which is a real issue in Queensland. Check our note on UV-rated Ethernet cable before running anything between the dish and the house.
If you run a Starlink Mini, there is an extra detail. Using a standard RJ45 cable means the Mini is no longer rated IP67, whereas the official cable keeps its weatherproofing. On the Mini, bypass can also switch off the built-in Wi-Fi so the unit connects through its Ethernet port.
Perspective: how we approach it
Most bypass problems we see are not about the toggle. They are about what sits around it: a dish with a partial sky view, a long or cheap cable run, a router dumped in a hallway cupboard, or two routers fighting each other.
Our rule is to decide the network first and the mode second. If a property needs one simple Wi-Fi network, we usually leave Starlink's router in charge or use access points, and we do not add complexity for its own sake. If it needs VLANs, camera separation, a comms rack or several buildings, we put a proper router in charge, turn bypass on, and cable the access points so there is no wireless guesswork.
We design, install and configure everything with one licensed team and no subcontractors, so the person who mounts the dish is the person who configures the router. That is why you do not get finger-pointing between the satellite installer, the cabler and whoever did the Wi-Fi. We also aim to fix problems on the first visit, and we hand over a system we have documented rather than a pile of boxes.
One piece of advice we repeat often: record your settings before you change anything, and test on the stock setup first. Ten minutes of preparation saves an afternoon of resets.
— Dylan
Troubleshooting a bypass setup that will not connect
Work through these in order.
- No internet after enabling bypass. Check that your router's WAN port is in the Starlink port or adapter, and reboot the router so it requests a fresh address.
- Starlink Wi-Fi vanished and you cannot reach the app. That is expected. Connect your phone to your new network, or factory reset to go back.
- Slow speeds. Test with a laptop plugged straight into your router. If wired is fast and Wi-Fi is slow, the problem is coverage or interference, not Starlink.
- Double NAT warnings. You probably have two routers routing at once. Either enable bypass or set your own device to access point mode.
- Some app features missing. This is a known limit of third-party routers, as noted earlier.
- Random drops. Look at the dish first: obstructions, loose connectors and weathered cable cause more drops than any setting.
If you want to compare the satellite option with alternatives on your block, our guide on Starlink versus 5G in Australia sets out the trade-offs, and the Starlink installation cost breakdown explains what can push a job's price up.
Get it set up properly
If you would rather not spend a weekend on resets, our Starlink and NBN installation service covers dish mounting, cabling, Ethernet adapters and bypass configuration across South East Queensland. For larger homes, offices and rural properties, our networking and Wi-Fi work includes structured cabling, managed switches, comms racks and site-surveyed mesh. We scope each job to a fixed scope before we start.
FAQ
What happens when I put Starlink in bypass mode?
The Starlink router's Wi-Fi and routing are switched off. Your own router takes over the network, and the Starlink router only powers the dish and passes the connection through. You also lose some app features.
Can I use my own router with Starlink without bypass mode?
Yes. You can leave bypass off and set your own router or mesh to access point mode, which avoids double NAT. Bypass is only needed when you want your own router to handle routing.
Do I need a Starlink Ethernet adapter?
Only with a Gen 2 router, which has no Ethernet port of its own. Newer Gen 3 hardware has built-in Ethernet ports, so you can plug in directly.
How do I turn off bypass mode?
There is no switch in the app. You factory reset the Starlink router, which restores its original Wi-Fi. Expect to set the network name and password again.
Is Starlink bridge mode the same as bypass mode?
People use the terms for the same result: the Starlink router stops routing and your router does it instead. In the Starlink app, the setting is called bypass mode.
Sources
- What is bypass mode? (Starlink Australia)
- Setting up a Linksys mesh Wi-Fi system with Starlink
- How to Use Your Own Wi-Fi Router With Starlink (PCMag Australia)
- Third-Party Devices (Starlink Customer Guide)
- Starlink Bypass Mode: How To Use Your Own Router
- How to connect Deco with Starlink (TP-Link Australia)
- Can I use a network switch with Starlink? (Starlink Help)
- Starlink Ethernet Adapter Setup Tutorial (DISHYtech)
- The Starlink app (NasNet)
- Cat6 vs Cat6a: Which Cable to Specify in Your Office